Sunday, December 11, 2016

The Easiest Way to Render Lard--Use a Slow Cooker!

Render Lard the Easy Way!

I was recently given about 8 pounds of hog fat by a friend of mine who had just butchered. My work schedule was currently hectic, and I knew it would be hard to find the time to laboriously cook and stir for hours to render out the lard. But in my opinion, cooking and especially baking with lard is the best, so I considered my options. Now, I've always rendered lard the old-fashioned way: on a stove top with large kettles. But I had read accounts of folks using their slow cookers instead of kettles, and one thing that had stuck in my memory was that you don't need to constantly be stirring the pot because cooking the hog fat on low in a slow cooker virtually guarantees no burning. I figured I'd give it a try, and I'm so glad I did because the results were spectacular!

Snow White Lard

Here's how to render out gorgeous, mild lard:

First, cut off much of the meat that might be still clinging to the fat (no need to obsess about this), and then cut the fat into small pieces, about 1 inch square. Place them in your slow cooker and add about 1/8 cup of water  (if you have a full pot of fat pieces), or possibly less if you don't have a full pot. You can start by turning the slow cooker on high to heat everything up, but move the setting to low after about 30-60 minutes and keep it on low for the rest of the time.

Here's what mine looked like:
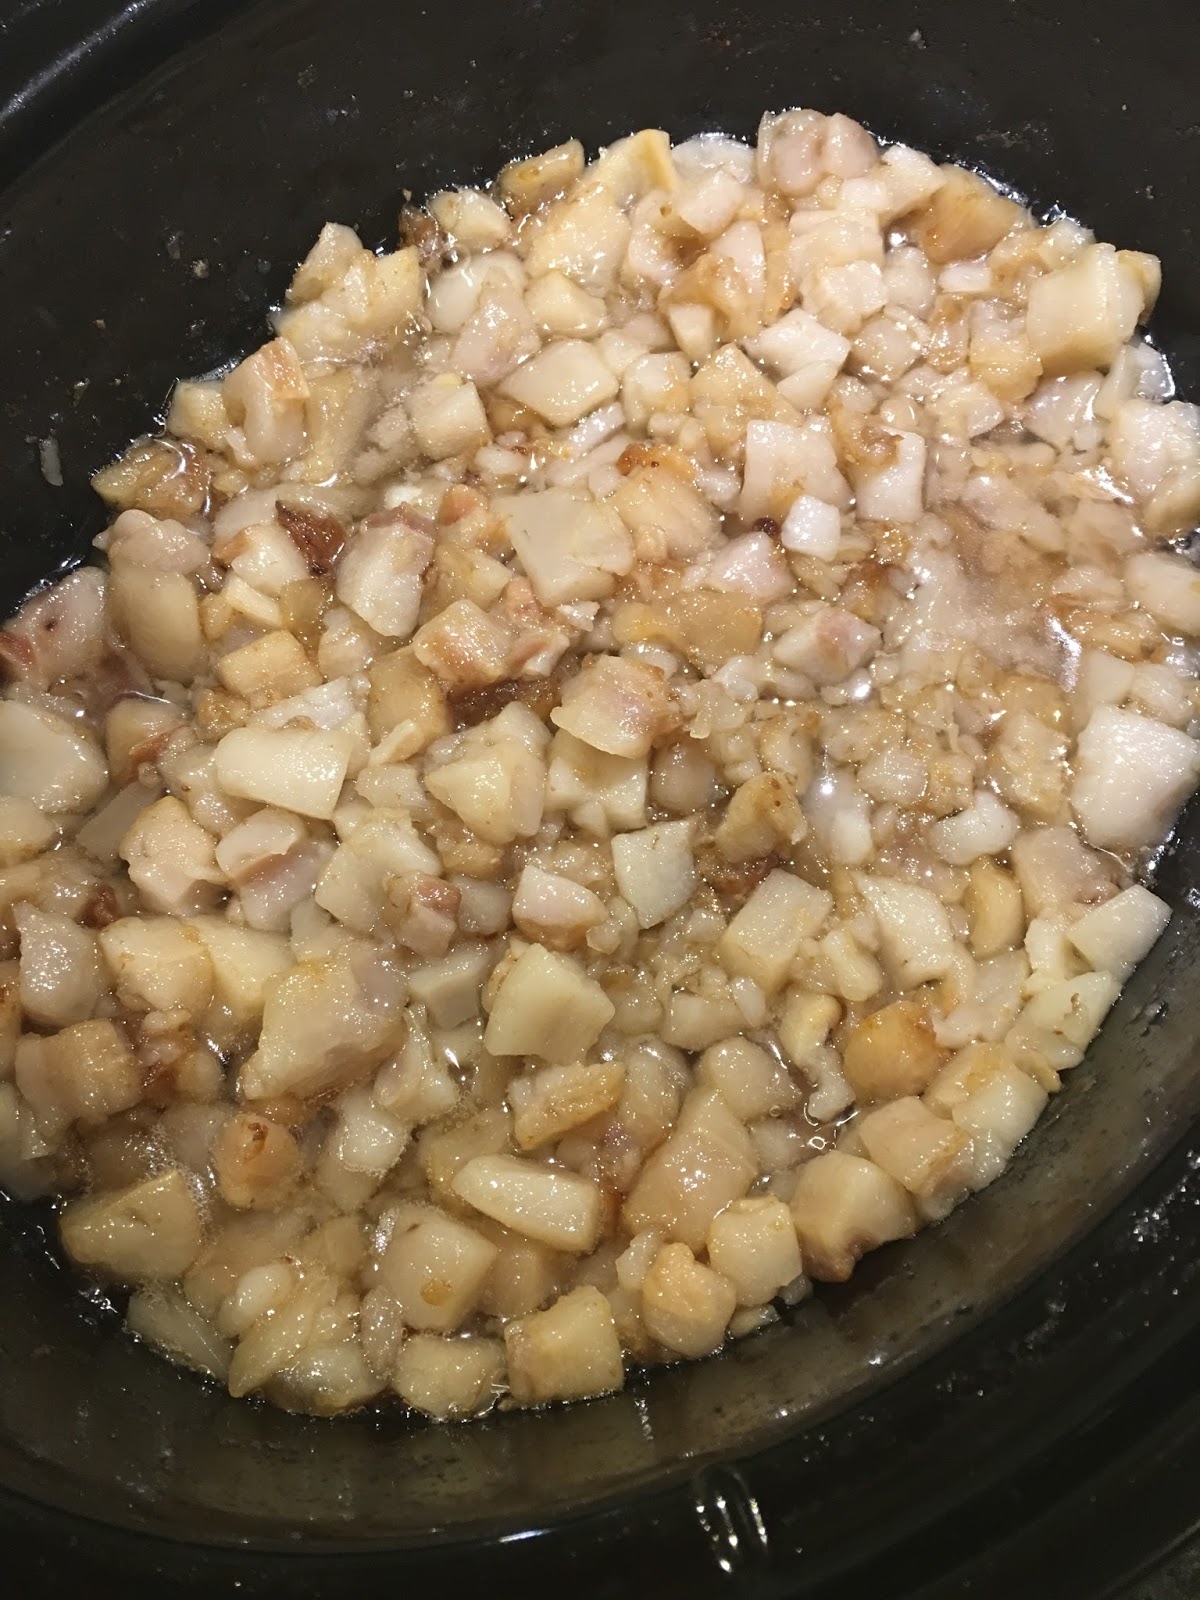
Pieces of hog fat in my slow cooker beginning to melt.
From time to time I stirred the pot and cocked the lid of my slow cooker so the water would evaporate over time. After about only 3 hours I began the process of pulling off the lard. Basically you can either pour or ladle out the melted fat and filter it through a colander that has been lined with several layers of cheesecloth:
Filtering the lard
I continued to filter the lard as the fat melted. Prior to beginning the process, I sanitized pint-and-a-half canning jars so they would be ready when I needed them. (I'm currently low on quart jars or I would have used them instead. But use whatever you have because the size doesn't matter.)

Just keep up with this process until you aren't getting anymore melted fat and what's left in the slow cooker has turned brown. Those brown chunks are cracklings, and lots of folks eat them and consider them a real treat. I just spread out the cracklings on large baking sheets, give them a shake of salt, and then bake them in a 350 degree oven for about 20 minutes, stirring them once or twice while they are crisping up.
Cracklings!
That's all there is to it. And when you're done, treat yourself to the best pie crust or biscuits you've ever tasted. Simply substitute the lard for Crisco in your favorite recipe. Heaven on earth!
Lard, ready to refrigerate and use when needed.

If you don't raise your own hogs, check around in your community to see if you can find a local hog farmer who might be willing to give you fat,  sell it to you, or let you take it if you give him or her half of the lard that you render. Alternatively, if you have a local meat processor or market, they might have hog fat to give or sell to you also.

Wednesday, September 28, 2016

Vegetable Gardening in My Front Yard


It has been quite a summer, and the Lilliputian Cottage is thriving!

I made the decision to tear up my front yard and grow vegetables, fruit, and flowers there. I think it has been a good decision. And an added bonus is that I've met many new neighbors who regularly stop by to chat, ask questions, and visit. Their stories are interesting and varied...and sometimes quite poignant. It gives me the chance to spread a bit of joy and encouragement as well as good, freshly harvested veggies.

One story in particular stands out to me. There is a young lady who walks by my house on her way to the library, pushing a baby stroller that holds her beloved dog. She is neurodiverse. She always stops and talks if she sees me outside, and early in the season she told me more than once that she loves cucumbers. So, when my cucumbers began to ripen, I invited her into the garden and we picked all the cucumbers that were ripe. I picked some other veggies for her, and she left for home with a big shopping bag filled with produce--all of it fresh and at its best and grown with no pesticides, etc. She was so thrilled! She has been back several times, asking if my cucumbers are ready to pick again. We have had to come to an understanding that we need to share! But it pleases me that we have become friends after a fashion.

Like everything at the Lilliputian Cottage, my front yard isn't all that large. But it had two monster fir trees that overwhelmed the yard. The roots wandered underground all the way to my house, and they went under the sidewalk and, I'm sure, under the street as well. They were just plain old too big for the space. And I worried every time a strong wind came up that they'd crash into my tiny house. So I got permission from the city to take them down, and that's what I did last fall.
The second tree is coming down!
Getting ready to dig up the yard

As you can imagine, the mess was something else. One of my sons got an obviously very nice friend of his to buck and move the wood to my backyard, and then I had a company come in and start digging up roots. They filled up two monster dump trucks and didn't get nearly all of them. But it made a huge difference nonetheless.

A lovely fence was built, with privacy for the backyard, and a framed wire fence surrounding the front yard. I love my choice of fencing and wouldn't change it in any way!
Work begins on the fence

The fencing is done and we're ready to spread compost!

Now the fun part began: I started planting things. As is the case with many of us, I had a budget to adhere to, and most of said budget had already been spent on the big stuff. But I knew that I'd be able to add and expand over the next several years, so I was content to start small. I most planted annual vegetable seeds and starts, although I was able to plant three blueberry bushes that rewarded me with almost two quarts of blueberries! (When the bushes grow big, I'll be blueberry rich for sure!) And I planted two artichoke plants, which come again except in the very coldest of winters when they will die back. Still I love artichokes, so I took the chance. I also planted some perennial herbs and flowers...but mostly I stuck with cheap annual veggies and flowers.

My garden grew.


And grew!

AND GREW!


Delphiniums are a favorite of mine!


Borage in full bloom. Good for people and good for my bunnies.

My first year of front-yard gardening is winding down. I'm hoping to make some raised beds for next year because I think it will keep the area looking more organized. But I'll continue to have a wide swath of flowers all around the perimeter. Bees love flowers. I love flowers (and herbs!). And my neighbors seem drawn to the colors and textures.

In the early morning I pour my first cup of coffee and wander through the garden. I water, or weed, or harvest, depending on the current need. But I always--always--cherish the time spent among my plants. They feed my body as well as my soul, and I'm grateful.

Blessings to you and yours. Life is guaranteed to be difficult sometimes, but when life gets ugly, hold your head up, square your shoulders, and carry on. Because you are precious!

Georgia

Wednesday, August 17, 2016

How to Make Self-Rising Flour...Cake Flour Too!

Yesterday I got a wild bee in my bonnet and just HAD to bake some biscuits using a new recipe. One of the ingredients happened to be self-rising flour, which I never keep on hand because it's so easy to make my own. But that didn't slow me down because it's so easy to make your own. Here's how:


Homemade Self-Rising Flour

For every one cup of flour, measure out the flour and then remove 1 3/4 teaspoons flour (you'll be adding that amount back in with the following ingredients); add 1 1/2 teaspoons baking powder and 1/4 teaspoon salt; mix everything together well and either store it for future use or add it to your recipe. That's it!

Remember that if you decide to use self-rising flour in a recipe that doesn't call for it, you'll want to delete the baking powder and salt (or at least some of it) because it's already included in your special flour.

Homemade Cake Flour

And since I'm on the subject of flour, I thought I'd tell you how to make cake flour also. I have a very few cake recipes that call for this special flour, and my frugal nature won't allow me to run to the store and buy an incredibly expensive box of the stuff. So instead, I haul out my cornstarch and make my own.

First of all, I use all-purpose white flour for this--I've never tried it with whole wheat flour and I don't think it would work well because the gluten content in whole wheat flour is so high. But even so, I can't bring myself to ever buy bleached all-purpose flour, so I opt for unbleached all-purpose flour. I don't know if there would be a difference if using bleached, but I thought I'd throw that out into the ether.

Measure out one cup all-purpose flour; remove 2 tablespoons flour and add 2 tablespoons cornstarch. Mix well and then before using, sift so it's light and fluffy.

Well, I'm going to say good bye for now. I have work deadlines and need to keep on track. Plus three of my grandkids are coming over this evening and we're going to have a magic marker coloring fest (I bought new markers--the kind that don't mark anything except the special pages--and special marker coloring books). I can't wait!

I hope that life is treating you and your loved ones gently. But if you are in the midst of a storm right now, keep your chin up and remember that better times are coming, just as sure as the seasons change.

Georgia

Tuesday, July 19, 2016

Georgia Varozza (Georgia Plain and Simple) Featured in a Podcast with Pioneering Today


Hello, friends-

I was recently featured in a podcast with Melissa K. Norris of Pioneering Today. Our conversation was wide-ranging and fun, fun, fun! I hope you enjoy listening to it as much as I enjoyed talking with Melissa.

Blessings to you and yours,
Georgia

http://melissaknorris.com/10-life-lessons-from-the-amish-and-mennonites/

The Amish Canning Cookbook Is Officially a Bestseller!

Hello, all! Yesterday my publisher informed me that the ebook version of The Amish Canning Cookbook was listed last Friday in Publisher's Weekly as #7 on the top-20 bestsellers list in the cooking, food and wine category. I'm pretty happy about that!


Thursday, May 12, 2016

Relaxing Tea Recipe

Hi, all-

Below is the link to a blog post I wrote for the Harvest House Publishers' website. The tea is easy to make in bulk, so when you need soothing in a hurry, you'll have the ingredients on hand.

Enjoy, and blessings to you and yours!

https://www.harvesthousepublishers.com/blog/feeling-overwhelmed-find-calm-in-the-midst-of-chaos

Thursday, March 31, 2016

No-Knead Oatmeal Bread

Hello, all, and happy spring!

The sun is shining and the temperature is mild...something no one who lives in the Pacific Northwest takes for granted at this time of year. There's a reason why we are known for having such lush, green plants and trees, and it's a direct result of all the rain we endure in the winter and springtime. (Days and sometimes weeks at a time!) So when we are blessed with a sunny day, we take advantage of it!

When the sun shines, we get outside if at all possible. But we still must feed our loved ones, and today's recipe might work well on such a busy day. You see, it's a recipe for yeast bread, but there's no need to knead. The bread is tasty and makes a good sandwich bread, which you can use for tomorrow's lunch if you have any leftovers. Really, that's rather surprising to me, because a no-knead bread generally is crumbly, while this loaf performs quite well.


The bread may not be pretty, but it's a great addition to your recipe cache. It works up fairly quickly, takes minimal input from you, and produces a tasty loaf that will put a smile on your family's faces. What's not to like about that?


No-Knead Oatmeal Bread

2 to 2½ cups all-purpose flour
¾ cup rolled oats
1 tsp. salt
2¼ tsp. (1 package) active dry yeast
1 cup water
¼ cup molasses
¼ cup butter
1 egg

In a large bowl, combine 1 cup of the flour, rolled oats, salt, and yeast; blend well.

In a small saucepan, heat the water, molasses, and butter to quite warm (120º to 130º). Add the warm liquid and the egg to the flour mixture. Using electric mixer or beaters, blend at low speed until flour mixture is incorporated and then turn the mixer to medium speed and continue mixing for 3 minutes. Stir in an addition 1 to 1½ cups of the flour to form a stiff batter. Cover the bowl with a towel and let the batter rise in a warm place until doubled, about 45-60 minutes.

Stir down the batter and then pour it into a greased loaf pan. Cover and let rise until the batter reaches the top of the pan.

Preheat oven to 375º and bake for 35 to 40 minutes or until done. Remove the bread from the pan immediately and cool on a wire rack.
I hope your day is going well and that there is time in your day to pause and simply glory in God's creation. To my way of thinking, that is always a boost to the spirit.
Blessings and peace to you and yours,
Georgia

Thursday, March 17, 2016

Using Epsom Salt in the Garden Helps Plants Grow Lush and Productive

Hello, all!

I was asked to write a guest blog post over at Amish Reader, and decided that--because the days are lengthening and warming up--I'd write about the uses of Epsom salt in the garden. I learned the secret of using Epsom salt many years ago from an elderly Amish Mennonite woman, and since then I've expanded my use to include the veggie garden and fruit trees.

You can read about these uses at http://www.amishreader.com/2016/03/14/a-gardening-secret-learned-from-the-amish-article-by-georgia-varozza/

Enjoy!

Blessings,
Georgia