Pages

Wednesday, December 31, 2014

Stewed Tomatoes and Dumplings Recipe


This recipe I'm about to share with you is a very old one. It uses basic ingredients, and the end result is so tasty. Another plus is that Stewed Tomatoes and Dumplings is very filling, easy to prepare, and incredibly cheap--especially if you use produce from your own garden. But even if you need to make a trip to the grocery store, it's still an inexpensive dish and worth trying. I hope you like it!

Stewed Tomatoes and Dumplings

Stewed Tomatoes
1/4 cup butter
1/2 cup onion, finely chopped
1/4 cup celery, chopped
1 28-ounce can whole tomatoes, coarsely chopped, with juice (or you can use 2 soup-can-sized cans of stewed tomatoes or diced tomatoes, or a 2 pint jars or 1 quart jar of home-canned tomatoes)
2 tsp. brown sugar
1/2 tsp. salt
1/2 tsp. dried basil
1/4 tsp. pepper

Dumplings
1 cup flour
1 1/2 tsp. baking powder
1/2 tsp. salt
1 T. butter
1 egg, beaten
6 T. milk
1 T. fresh parsley, minced (or a big pinch of dried parsley)

For the stewed tomatoes: In a medium  saucepan (preferably one that is wide and low so you have more surface area for the dumplings), melt the butter and sauté the onion and celery about 3 minutes. Add the tomatoes and juice, and the brown sugar and seasonings, and bring to a boil. Simmer uncovered for several minutes.


For the dumplings: In a mixing bowl, combine the flour, baking powder, and salt. Cut in the butter using a pastry blender or two knives or forks until the mixture resembles coarse cornmeal. Add the egg, milk, and parsley and blend lightly. Do not overmix. Drop dumplings by tablespoonfuls on top of the simmering tomato mixture. Cover tightly and cook over medium-low heat for 20 minutes. Do not lift the cover during the cooking period.

You've probably noticed that my dumplings are way bigger than "tablespoonfuls" as the directions state. I always make large dumplings (I like them better that way!) but I take care to cook them for about 25 minutes instead of the 20 minutes called for so the dumplings are cooked through. You can do it either way--cook's choice!


Serve in bowls, topped with butter if desired.

This is a great winter side dish. It's warming and filling and hits the spot when the winter winds blow!

May you and your loved ones be well fed, kept warm and safe, and mindful of your blessings!
Georgia

Saturday, December 20, 2014

Candied Apples--A Great Winter Treat!

When I was a kid, every year when the apple harvest came in, my mama would make candied apples. We loved them! And I can remember in years past seeing boxes of candied apple mix displayed next to the bins of apples for sale for shoppers who wanted a bit of a head start. But for some time now, I don't see those packages available. Instead, grocery stores offer little tubs of caramel to dip your apple slices in. But the fact is, I would miss my yearly dose of candied apples, so I choose to make them myself--just like Mama did.

Candied apples are incredibly easy to make and about the only kitchen tool you need that you might not already have is a candy thermometer. (No instant-read or meat thermometers for this recipe.) So run down to the local store and pick one up and then come home and make this fun, kid-friendly recipe:


Candied Apples

anywhere from 5-12 apples, depending on size
an equal number of popsicle sticks or short bamboo skewers
2 cups white sugar
1 cup light corn syrup
1 1/2 cups water
8 drops red food coloring

Lightly grease cookie sheets. Or do like I did and use a silicone baking mat. Nothing sticks to them. (Love those things!)

Wash the apples and dry thoroughly. Remove stems. Insert the popsicle sticks into the apples at the stem end. Set aside for now.

In a medium saucepan over medium-high heat, combine the sugar, corn syrup, and water. Stir while the sugar is dissolving, but once it gets boiling you only need to give it a stir every now and again. Heat the sugar syrup to 300-310 degrees F, or until a small amount of syrup dropped into cold water forms hard, brittle threads. This is my saucepan of syrup boiling away:


Once the temperature has been reached, remove the pot from the heat and stir in the food coloring.

Working quickly and holding the apple by its stick, dip the apple into the syrup, remove, and turn and swirl the apple so the syrup coats it evenly. Place on the prepared sheet to harden. But keep in mind that the syrup will start to thicken and begin hardening as soon as it's off the heat so working quickly is a must. As I get to the bottom of the batch, I will tip the saucepot a bit so I can more easily coat the apples. You'll get the hang of it in a hurry; it's not hard to do. And they don't have to be works of art because candied apples are fun food at its finest. Just enjoy what happens!
Some people love to add those cinnamon candies that are tiny little oblongs. I never do because that's not how we ate them when I was a kid. But your family might like cinnamon, so if you want to try that, throw in a handful of candies while the syrup is boiling so they dissolve when the sugar does.

Candied apples are a messy, wonderful treat and believe it or not, they are good companions to popcorn. So gather the family together, put a movie into the DVD player, cuddle up, and enjoy a family evening. It's homemade fun and great memories in the making!

I pray that this holiday season is filled with joy for you and your loved ones. Please, remember in prayer those who are less fortunate or may be going through a tough time. Gift them with your time and give them a hug while you're at it. Be God's hands and feet and heart.

Blessings to you and yours!
Georgia


Wednesday, December 17, 2014

The Best Dinner Rolls! Mashed Potato Rolls

We had a Christmas celebration today at work and I made a batch of rolls to go with the delectable corn chowder that is a Christmas lunch tradition around here. I'm often given to making cracked wheat or even whole wheat dinner rolls because I figure they are healthier for my crew (even though said crew far prefers white bread), but someone here at work asked--begged, really--that I make good old fashioned white dinner rolls. How could I refuse? I couldn't, and I'm so glad because it reminded me of just how good these delicious rolls are.

Mashed Potato Rolls are more or less your typical yeast roll except for the fact that they include--surprise!--mashed potatoes. The mashed potatoes make the finished product moist but not dense, and supposedly, mashed potatoes in a recipe means your batch of goodies will last longer before getting stale...although I've never personally experienced that because food doesn't last long enough in my little world to ever get stale. But there you have it.

Here's a close-up of the finished product. Had I known I was going to want to blog this recipe, I would have taken more and better photos. But one will have to suffice:


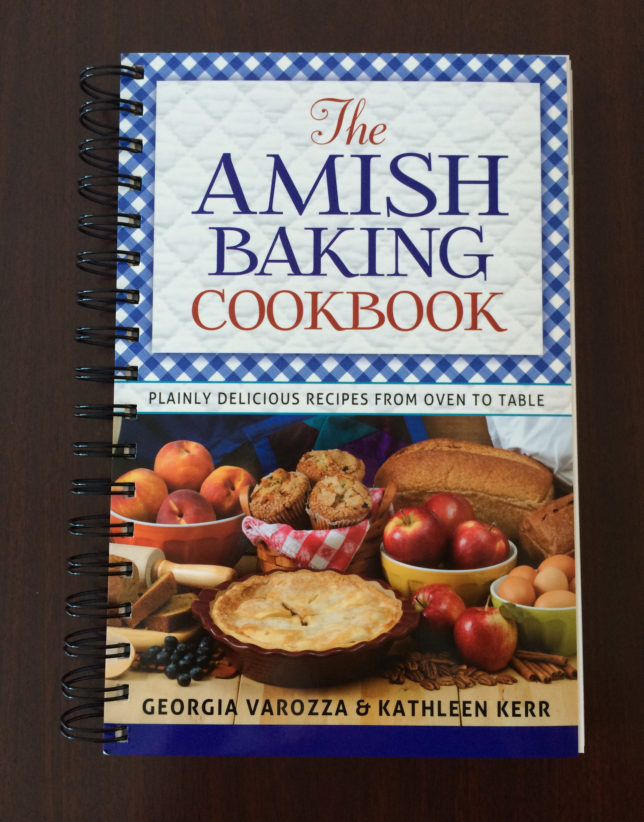
And here is the recipe, which comes from my book titled The Amish Baking Cookbook:


Mashed Potato Rolls

2 1/4 tsp. (1 package) active dry yeast
1/4 cup warm water
1 3/4 cups warm milk
1/4 cup butter, softened (room temperature)
1/4 cup oil
6 T. sugar
1 egg
1/2 cup mashed potatoes (see note at end of recipe)
1 1/2 tsp. salt
1 tsp. baking powder
1/2 tsp. baking soda
6 cups all-purpose flour
melted butter (optional)

In a large bowl, dissolve yeast in warm water. Add the milk, butter, oil, sugar, egg, and mashed potatoes and mix well. Stir in salt, baking powder, baking soda, and half the flour. Mix either by hand or using a stand mixer, adding flour until a soft dough is formed.

Turn out onto a floured surface and knead 6 to 8 minutes or until the dough is smooth and elastic.

Place the dough in a large greased bowl and turn so the entire surface of the dough is greased. Cover with a clean towel and let dough rise until double, about 1 1/2 hours.

Punch down dough. Break off bits of dough into approximately 32 round balls. (I usually make mine a bit large...more like a total of 28.) Place balls 2 inches apart on greased baking sheets. Cover and let rise until double, about 30 to 45 minutes.

Bake in a preheated 375 degree oven 15 to 18 minutes or until done and lightly golden on top. Remove from the oven and if desired immediately brush or dip tops of rolls in melted butter. Set on racks to cool.

Note If you don't have any leftover mashed potatoes and you're in a hurry, you can use dehydrated mashed potatoes. Just mix according to the package directions and use in place of fresh mashed potatoes.

Monday, December 15, 2014

Pistachio Cream Dessert

I've been messing around in the kitchen a lot lately because I'm writing yet another cookbook. The dessert I'm going to share with you today is a result of those kitchen endeavors.

For some reason I can't possibly fathom I've been fond of the idea of making Jell-O and/or pudding desserts. They just seem so old-fashioned, easy, and kid-friendly. And with an ever-growing passel of little ones in the Varozza clan, it seemed somehow fitting that I explore this tangent.

So today, I'm going to share with you Pistachio Cream Delight:


Pistachio Cream Delight


First Layer:
1 cup walnuts, finely chopped
2 cups flour
1 cup (2 sticks) butter, room temperature

Mix together all ingredients and press into a 9 x 13-inch baking pan. Bake at 350° for 15 minutes; cool completely.
Here's what the baked crust layer looked like when I pulled it from the oven:
I wasn't too impressed, but I kept on going. I soothed myself by thinking that the other layers would soon hide this lumpy, bumpy crust. (Which, by the way, turned out tasting delicious!)
 
Second Layer:
4 oz. cream cheese
1 cup powdered sugar
1 cup whipping (heavy) cream, sweetened and whipped until soft peaks form (I used about 1 tablespoon sugar and a small amount of vanilla)

Cream together the cream cheese and powdered sugar until smooth. Fold in whipped cream, blending well. Spread evenly over cooled crust.

Third Layer:
2 3½ -oz. boxes instant pistachio pudding
2¾ cups cold milk
1 tsp. vanilla

Mix together all ingredients and beat for 1-2 minutes. Spread over the top of the cream cheese mixture. Refrigerate.
 
When ready to serve, you can top with more sweetened whipped cream and sprinkle on some chopped walnuts or pistachios if desired.
 
I know I began this post with a picture of my piece, but it doesn't hurt to end things with the delicious results. Because it was delicious, and so easy that it's the perfect church/family potluck item to whip up in your spare time.
May you and your loved ones, whatever shape that takes in your life and circumstances, be blessed this Christmas season. And may you learn to spot joy in even the most unlikely of places during this time. Were I to ask one thing of you, it would be this: Please, open the eyes of your heart and show love and grace to someone it might be easy to pass by--to not "see." Christmas is the date we have set aside to celebrate the birth of the Christ Child. Let us show our love and reverence for His great work on our behalf by being his hands and feet to those less fortunate. Together we can accomplish so much!
 

Tuesday, December 9, 2014

Chocolate Candy Cane Cake Recipe--Perfect for the Holidays!


Cooks seem to do their best work during the holidays, making mouthwatering dinners and baking delectable treats--many of them tried and true family traditions. That is certainly true at my house, and the Christmas season just wouldn't seem complete without my Chocolate Candy Cane Cake. I wait all year to make this treat because even though you can use any hard peppermint candy, I think that candy canes are the only thing to use. And because of that, I must wait patiently until candy canes are available in stores. And that comes only once each year. But because I'm required to wait, the resulting cake seems extra special.
Even though this cake is made from scratch, it's not difficult and goes together well. And the result? Well! The cake itself is moist and very chocolaty, but with a subtle peppermint undertone. And the frosting? Oh my word but it's tasty! In fact, the frosting could be made for any cake you want; just leave out the peppermint candy (or not!).
Here goes:

Chocolate Candy Cane Cake. Yum!


Chocolate Candy Cane Cake

cup butter, room temperature

1 cups granulated sugar

3 eggs

2 cups flour

cup cocoa powder

1¼ tsp. baking soda

¼ tsp. baking powder

1 tsp. salt

1 cups milk

½ cup crushed peppermint candy canes (or other hard peppermint candy)

Chocolate Peppermint Frosting (recipe below)


Grease and flour two cake pans; set aside for now.

In a large mixing bowl, cream together the butter, sugar, and eggs until well mixed and smooth; then beat on high speed for 3 minutes more.

Mix together the flour, cocoa powder, baking soda, baking powder, and salt; add to creamed mixture alternately with the milk, blending well after each addition. Blend in the crushed candy canes.

Spread batter evenly between the two cake pans and bake in a preheated 350° oven for 35 minutes. Cool for 10 minutes before slipping cakes from pan and allow them to cool completely before frosting them with chocolate Peppermint Frosting.

Chocolate Peppermint Frosting

½ cup butter

½ cup cocoa powder

3 cups powdered sugar

7 T. milk

1 tsp. vanilla

1 T. crushed candy canes

In a medium saucepan, melt the butter; stirring constantly. Add the cocoa powder and cook for about 1 minute until smooth; remove from heat. Beat in the powdered sugar and milk and continue beating (I do this by hand with a large wooden spoon or rotary egg beater) until mixture is smooth and of spreading consistency; add the vanilla and crushed candy canes and beat again until smooth. Spread between the layers and all around the top and sides of Chocolate Candy Cane Cake.

 I hope you give it a try. Your friends and family will be well pleased!

I pray that during this holiday season, you and your loved ones will experience deep and abiding joy and peace. Resist the urge to do too much, and turn away from the crass commercialism and resulting stress that come from overspending. It may not always be easy to go against the tide, but trust your heart and concentrate instead on the holiness of the birth of our Lord and Savior. Spend time with those you love. Remind others of all the ways they are special. Meditate on what you have to be thankful for. Be extravagant with your hugs and kind words. Those are gifts that will be cherished!

Have a merry and blessed Christmas!

Georgia

Wednesday, November 5, 2014

Sugared Fresh Cranberries Recipe

Lately, here and there (like on Pinterest) on the Internet, I've come across sugared cranberry recipes. Then I got a pound of Bandon, Oregon cranberries and thought this would be the perfect time to try my own concoction based on what I've been seeing around. Here's what I came up with:

Lovely, tasty sugared cranberries!

And here's how I did it:

Sugared Fresh Cranberries

12 oz - 1 lb. (16 oz.) fresh cranberries, washed
1 1/4 cups granulated sugar, divided
1/2 cup water

In a medium saucepan, mix together 1/2 cup of the sugar and water. On medium heat and stirring constantly, heat the syrup until the sugar has dissolved; remove from heat.

Place the cranberries into the syrup and gently mix so all surfaces of the berries have been coated with the syrup. This won't take more than about 30 seconds because you don't need to cook them; rather, you just want to coat them.

Coating cranberries with warm sugar syrup

Using a slotted spoon, remove the berries from the syrup and place them on a rack to dry for one hour. You may need to work in batches if they don't all fit into the pot you use.

Cranberries draining
As you might be able to discern in the photo above, my makeshift draining rack was pretty hokey, and the drain holes were so big that some of the cranberries fell through to the paper-towel-covered counter. As it turns out, that didn't prove to be a problem at all. (Thankful for that!)

After the cranberries have sat for an hour they should be tacky to the touch. Now, working in batches, roll the berries in the remaining 3/4 cup of sugar; place the sugared berries in a single layer back onto the rack or use a large jelly roll pan or some other low-sided baking pan. Let them sit for another hour or so before you store them. I stored mine in a large mixing bowl with an old-fashioned plasticized cloth covering. (I figured the cloth covering would allow a bit of air to circulate and my thinking for that was I didn't want the sugar to get soft, which seemed likely were I to use plastic stretchy wrap instead.

Now the only thing left to do was eat them! So I did, and they were oh, so good. :)

Sugared Cranberries close-up

I hope you give this easy recipe a try. They are rather an addicting snack when eaten plain, but I'm going to try them in a tossed green salad tonight for supper. I imagine they will be fabulous. I'll splash on oil and vinegar to dress the leaves and throw in a handful of blue cheese crumbles. Yum!

May God be with you and yours!

Georgia

Tuesday, November 4, 2014

eBook Deals on Two of My Books from Harvest House Publishers!

Hello, all-

First of all, I'd like to tell you why it's been more than a week since you last heard from me...because it's such terrific news that I'm about to bust!

One of my sons/daughters-in-law just had their third baby--a boy who is the spitting image of his three-year-old big brother. Uncanny how alike they look! Both of them are handsome little fellows and I was smitten the moment I laid eyes on him. Babies fresh from heaven--there's no better feeling!

So now let's get down to the reason for my post today. My publisher, Harvest House Publishers, has an e-book deal going on and two of my cookbooks are featured: The Homestyle Amish Kitchen Cookbook (a perennial favorite with readers and offered at $1.99 today through December 2) and The Amish Baking Cookbook (my newest release, offered at $3.99 from today through December 2).
Here's the link:

http://harvesthousepublishers.com/ebook-deals/

If you're an e-book user these are cheap, cheap prices so take advantage of the deal. You can call it an early Christmas present to yourself. Because you're worth it. :)

Hope you have a lovely day and remember: God adores you!

Blessings to you and yours,
Georgia

Saturday, October 18, 2014

The Best Gingerbread Recipe Ever!

Fall has arrived with a vengeance, and that always means (for me at least) a change in my taste desires. I start craving hearty stews, mashed potatoes, anything with pumpkin, and homemade hot chocolate in the evening. So the fact that I'm sharing this particular recipe with you today only makes seasonal sense!

The gingerbread recipe I'm about to share with you is so outstanding that you could make a believer out of a confirmed gingerbread hater with this one.

Seriously.

It's feather light and not too spicy, but the classic taste still shines through. And when you eat it warm with whipped cream or vanilla ice cream? Words fail!


By the way, this recipe will appear in another Amish cookbook I wrote that is due on store shelves  sometime next year (99 Favorite Amish Recipes). But before that cookbook debuts, you can always satisfy your sweet tooth with my newest book, which was published last month:


And before my next cookbook arrives, I'll have this book available for sale at the beginning of the year:

It just went off to the printer, and I'm excited as I wait to get my first copies!

But okay...back to the gingerbread recipe.

Gingerbread

(Yes I know... that's a scintillating name for this recipe!)

1/2 cup (1 stick) butter
1/2 cup boiling water
1/2 cup brown sugar
1/4 cup honey
1/2 cup molasses
1 egg, well beaten
1 1/2 cups flour
1/2 tsp. salt
1/2 tsp. baking powder
1/2 tsp. baking soda
3/4 tsp. ginger
3/4 tsp. cinnamon
1/4 tsp. allspice

In a mixing bowl or stand mixer, pour boiling water over the butter; add the brown sugar, honey, molasses, and egg. Beat well.

Add sifted dry ingredients and beat until well mixed and smooth.

Pour batter into a greased and floured 8-inch square pan and bake at 375 degrees for 25 minutes; do not over-bake.

Allow the gingerbread to sit in the pan for several minutes before attempting to cut into pieces.


Oh, be still my heart! Of course I ate that lovely piece I showed you at the beginning of this post while I wrote this. I felt I should do a bit of recipe testing because I owe it to you, my dear readers, to make sure everything is shipshape. But I realized pretty early into the "testing" that I wasn't going to be able to make a definitive decision as to whether I had used hyperbole when calling it "The Best Gingerbread Recipe Ever," so of course I'll need to make myself a cup of coffee and have another piece. Just to make sure. I tell you, recipe blogging is a tough business.

Now if you'll excuse me, I've got some coffee to go make.

Blessings to you and yours.
Georgia


Sunday, October 5, 2014

Are There New Guidelines for Safely Using Canning Lids?


BPA-free banner and USA flags appear on newer boxes.
BPA-free lids have a "Made in USA" banner in upper right corner.

For the last number of months I've heard scuttlebutt about new guidelines coming from the Ball/Kerr company (now combined and going under the name of Jarden Corporation). What I heard over and over again was that when the lids became BPA-free (around 2013, I think), it was no longer necessary to sterilize the lids before using them--and in fact, if you did sterilize them, there was the likelihood that the softer sealing compound would thin to the point that a safe seal might not occur.

But these rumors came during the height of canning season and I frankly didn't allot the time necessary to check into things...until now.

I tend to be conservative in my canning methods and realize that many folks home-can using older recipes without any problem. But that's not my style. I figure that if the time and energy (not to mention funds) were spent to come up with these guidelines, I'd do well to notice. And I'm so glad I did! As it turns out, I had a hazy picture at best of what I was hearing.

Canning lids are metal "rounds" that cover something called Plastisol on the underside. Around the edge of the underside of each lid is the reddish rubber sealing compound.

First let's discuss the Plastisol underside...but we have to go back all the way to 1969 to get the story. That was the year that the canning jar companies changed from using latex to Plastisol. Before 1969 the recommendation was to sterilize the lids in boiling water and remove them from the water only when ready to use. The reason why? Because latex-based lids needed that softening action that came from boiling. But when the softer Plastisol was used, it was no longer necessary to boil them. So why did we continue to boil our lids?

As well as I can figure, it was mostly a result of poor communication between the canning lid companies and the public. (And the university extension services did nothing to shed light on the process I might add.)

Now move forward to about 2013. This was when Jarden announced that their canning lids were now being manufactured BPA-free. At that time there were clarifications made about safely handling the lids, which seems to me to have been merely coincidental in timing.

The new guidelines tell us we can simply wash and rinse our lids and keep them at room temperature until ready to use. But they also tell us that if we continue to simmer--not boil--our lids at 180 degrees (which many of us have been doing for years) we won't be overheating the lids and possibly contributing to seal failures. In other words, simmer away if that's your bent.

One more piece of good news (which really isn't "news," but has also come to the forefront of late) is that if we water-bath or pressure can our jars for 10 minutes, we don't need to sterilize the jars before filling. Personally, I think this is the best news of all. Sterilizing those jars was always a real pain, and I'd often resort to just washing them in my dishwasher and then feel guilty that I was cutting corners. But as it turns out, I was just fine. What a relief!

So has anything really changed as far as how I process food? Not really. But it is nice to know that I've been in the forefront of correct safe food processing without even knowing it. Before I called it cutting corners. Now I can call it leading edge. Ha!

Blessings to you and yours. May these lovely fall days be filled with the comforts of home and hearth!
Georgia


P.S.--These thoughts are my own. If I have inadvertently misstated anything, it's my doing alone, and I apologize!

Friday, October 3, 2014

The Amish Baking Cookbook (giveaway!)

Here's another chance to win my latest book, written with Kathleen Kerr!


And here's the link for the giveaway! http://bit.ly/1rQTiLA
The website is Amish Wisdom and it's a wonderful site, filled with lots of good stuff. Enjoy!

Sunday, September 28, 2014

Quick and Easy Homemade Cottage Cheese and Cottage Cheese Pancakes Recipe

It's fall. The trees are turning beautiful colors and the mornings are cool. I love the change in seasons, and even though it's hard to decide definitively, I think that autumn may be my favorite season. The busyness of summer is waning and the bone-aching cold and rain of winter hasn't yet set in. It's a great time for us to stand back, peruse our pantry shelves, and feel good about our efforts during the hot days of summer because our thrift and willingness to work means we can feed our families well during the coming months. I just love that feeling!

Today I'm going to share with you a "recipe" for making cottage cheese. It's quick and easy and, best of all, very tasty! And then I'll share a recipe for cottage cheese pancakes. They are delicious and easy to prepare as well. Can't beat that!


Cottage Cheese


1 gal. milk*
⅓ cup white vinegar
salt to taste

cream or half and half to taste

Pour the milk into a large, nonreactive pot (such as stainless steel) and slowly heat the milk to 180-190° F. (No need to stir.)
I use a thermometer to gauge the temperature.
 

When the milk has reached the proper temperature, remove from the heat and add the vinegar. Stir to mix and then let the mixture set for about 30 minutes or until the curds and whey completely separate.
Curds starting to form
 
Pour the curds and whey into a colander that has been lined with a double thickness of cheesecloth. Allow the whey to drain completely, about 15-30 minutes. From time to time you might have to lift the cheesecloth bundle to get the whey draining again as the colander can clog up. If just sort of life and shift the bundle and it seems to work.
Whey draining in colander leaving curds behind
 
Wrap the cheesecloth around the curds and rinse with cool tap water for several minutes, gently kneading the curds as you rinse.
Curds wrapped and ready to rinse
 
Drain again and then place the curds in a bowl. Add some cream or half and half if desired and salt to taste.
Oh boy! Cottage cheese!
 
Note: You can use the whey that's left behind in the cottage cheese making process to replace milk or water (there will be a lot!) in many recipes, such as biscuits, bread, cornbread, cooked oatmeal, and even smoothies. But remember that the whey from this recipe is acidic from use of the vinegar, so it will add a tangy taste to your food.

*In this recipe, low-fat or nonfat milk works well. I think it makes the curds “curdier.” I have no science to back this up...it's anecdotal. But that's been my experience.


Cottage Cheese Pancakes


1 cup cottage cheese
4 eggs
½ cup flour
¼ tsp. salt

¼ cup oil

½ cup milk

½ tsp. vanilla, optional

Mix together all ingredients until well blended and batter is smooth. Fry on lightly greased griddle or frying pan; leave plenty of room between pancakes for turning…and turn them quick because the batter is thin, but you’ll soon get the hang of it.

Cottage cheese pancakes frying. So tasty!
 
If you’ve ever eaten cheese blintzes or crepes, these pancakes will prove reminiscent. Not really a pancake, per se, these delicate pancakes make for an excellent light brunch or lunch when paired with a tossed green salad or a bowl of fruit. Or try them rolled around a bit of blackberry jam and then sprinkled with powdered sugar. I make these for breakfast, lunch, and sometimes even dinner because they’re just that good!

Well I hope your coming week will be an especially fine one, and I hope you can get outside to enjoy the lovely fall colors!

Blessings to you and your loved ones,
Georgia

Saturday, September 20, 2014

Homemade Chocolate Syrup (to Can)

The summer is beginning to wane...not that we can really tell around here because we continue to have hot days and warm nights. But there's just something in the air that lets me know that summer will soon be a memory. I'm pretty sure it has to do with the slant of the sun. And then of course when the days are getting noticeably shorter, it's easy to realize that we are headed into autumn...and then comes winter.

In the cooler months I love to drink my homemade hot chocolate. You can find my post with the recipe here:
https://www.blogger.com/blogger.g?blogID=7930746912146392794#editor/target=post;postID=2843674370395124971;onPublishedMenu=allposts;onClosedMenu=allposts;postNum=20;src=postname

It got me thinking that some chocolate syrup sitting on my pantry shelf would be nice too. I love the idea of being able to make things from what I keep stored, and I thought if I had some chocolate syrup, I'd be able to make a cup of hot chocolate using some reconstituted dry milk (if, for some reason, I didn't have any of my homemade mix handy), or I could drizzle it over some kind of sweet treat, or I could even use it for baking.

So I got onto the Internet and came up with my own version of...

Homemade Chocolate Syrup (to Can)

1 1/2 cups water
3 cups white sugar
1 1/2 cups cocoa powder
1 tsp. vanilla
1/4 tsp. salt
2 T. light corn syrup

In a mixing bowl, mix together the cocoa powder and salt; set aside for now. Get your jars sterilized and ready your lids and bands. I used 3 half-pint jars and had enough left over to almost fill a small 4-ounce jelly jar. I canned all of them even though the small jar wasn't full. It sealed fine, but I'll use that one first.

In a medium saucepan, whisk together the water and sugar. (I used a 3-quart pot and when I added the cocoa it really frothed and bubbled, so don't use anything smaller than 3 quarts!) On medium to medium-high heat, bring to a boil, whisking constantly. Once the sugar water boils, add the remaining ingredients and keep stirring. At this point, I turned down my heat a bit because for some reason the addition of the cocoa powder really gets things churning.

Continue whisking the mixture for about 15 minutes or so--you want to cook down the syrup a bit so it's thickened slightly.


At this point, you could use the syrup, or put it in a clean jar and refrigerate it for a week or so. But if you want to can the syrup, read on:

Ladle the syrup into your jars, using a funnel (that you've also sterilized!) and leaving 1/4 inch headspace. This is somewhat messy so once you've completed filling the jars, take a wet paper towel and do a good job of cleaning around the jar tops and threads. Place the lids on the jars and set them into a water bath canner that has hot (but not yet boiling) water in it.

Making sure that your jars are covered by at least 1 inch of water, process them in a water-bath canner for 15 minutes (begin timing once the water reaches a full rolling boil). At the end of the processing time, remove the cover to the canner and fish out your jars. Set them on a folded towel and you'll shortly hear the lids popping, letting you know that the seal is complete.

Don't move them until they are completely cool, and don't remove the bands until they've sat for at least 12 hours. Clean your jars with warm soapy water if they are sticky and put them on your shelf. Then stand back and admire your efforts!

Next time I plan on making a double batch because it seems to me that if I'm going to the trouble to can, I might as well make it worth my while. But for now I'm content. And I plan on having hot chocolate this evening, using some of my syrup, because I want to taste test the goods!

I hope you find this recipe useful and that you add to your stores for winter with this easy-to-make chocolate syrup. Even better? It uses shelf-stable ingredients you probably having sitting around. I love that!

Blessings to you and yours,
Georgia

P.S. - Be sure to get a copy of my latest book, The Amish Baking Cookbook. It's loaded with user-friendly, tasty recipes and will be a welcome addition to your collection!

e-Book Special--The Amish Canning Cookbook

Just a quick note to let you all know that the digital version of my canning cookbook is currently on a great discount...it's selling for a short time at only $1.99! What a deal! You can find the information/link at

http://harvesthousepublishers.com/ebook-deals/


Saturday, September 6, 2014

Corn Bread with Cheese and Bacon

Today is hot--it's over 90 degrees already, and the forecast is for continued hot weather this coming week, albeit with a slight cooling trend...hopefully staying in the 80s. But even so, I can feel the soon-coming turn of the seasons. Fall is just around the corner, no matter what the thermometer says.

Just this week I noticed that it was still pitch black outside when I woke up, while during the longest days of summer I can rarely beat the grey of early morning. And another thing that clues me in to the change in seasons is that I recently made my first batch of hot chocolate mix, which I only drink during the cooler months.

And then today, I got a terrible urge for chili and cornbread--again, something I'm not prone to eat during summer. So as a goodbye summer/hello autumn recipe, I'm going to share my cornbread recipe with you today. By the way, the recipe can be found in my latest book:

First of all, let's talk cornmeal. If at all possible, use freshly ground corn for your cornmeal. I'm a firm believer that cornmeal can go rancid quickly if left to sit on a shelf. But if grinding your own grain isn't something you do, then store your cornmeal in the refrigerator. That way it will last longer before turning. I do usually grind my own corn, but today I used an interesting heirloom variety that I got at our local Saturday Farmer's Market:
I've thought of growing this old-time variety and it was a pleasure to try it out first. It has a very corny taste, but isn't overpowering, even with the rich color. Here's a closer view of the ground corn so you can get an idea of what I'm talking about:
Now for the recipe:

Corn Bread with Cheese and Bacon

1 cup flour
1 cup cornmeal
1/2 cup instant dry milk
(or you could simply use 1 cup milk and leave out the water, which is listed below)
2 T. sugar
4 tsp. baking powder
1/2 tsp. salt
1/2 cup shredded Cheddar cheese
1/2 cup cooked, crumbled bacon (or use real bacon bits, which you can get in large bags for fairly cheap at Costco)
1 egg
1 cup water (which you'll leave out if you decide to use liquid milk instead of dry milk)
1/4 cup oil

Grease a 9 x 9-inch pan and set aside.(You could also get away with an 8 x 8-inch pan, but you may need to bake it a few minutes longer.) Preheat oven to 425 degrees.

In a large mixing bowl, combine the flour, cornmeal, instant milk, sugar, baking powder, and salt and stir to mix well. Add the cheese and bacon and stir well again.

In a medium bowl, beat the egg and then add the water and oil and mix until well blended. Stir this liquid mixture into the cornmeal mixture and beat by hand just until well blended and smooth. Pour batter into prepared pan. Bake at 425 degrees for 20-25 minutes or until done.

And this is the delectable result:
I think you'll love this recipe. It's hearty and tasty. But it's also just about foolproof, so if you want to add some finely chopped onions or peppers or what have you, go for it.

Obviously, cornbread teams well with chili, but it would also be good with soup or stew or even just a salad. Very versatile!

Try this recipe and see if your family loves it like my own family does. It's quick and easy and sure to please!

As the days of summer wind down and our thoughts and energy turn toward the coming cold months, I pray that you and your loved ones will be snug and well-fed throughout the season.

Blessings to you and yours,
Georgia

Saturday, August 30, 2014

Listerine Feet and Pennies--Oh, You Won't Want to Miss These Gems of Wisdom!

With the Internet ever present, ideas fly around the ether like greased lightning (think Facebook and Pinterest). I'm not immune, and I love to poke around on different websites and blogs to see if there might be something cool to try. My tendency in life is to find ideas that are easy, inexpensive, and relatively low-tech. As my sons like to remind me, I was born a hundred years too late, so the simple ideas are the ones I gravitate toward naturally.

Still and all, the Internet can be somewhat addicting--all that information at your fingertips! I get excited just thinking about it! But we all know (or at least we should all know) that all ideas are not created equal. So if you find something that sounds too good to be true, it most likely is. Still, it can't hurt to try new things. Within reason, of course.

Today I'll share with you two tips, and my opinion of the results.

The first tip has to do with this:


And this:
 
 
Summertime means someone is more than likely going to get stung by a yellow jacket or bee. Yellow jacket stings seem to be especially painful and they often swell up and cause great discomfort to the poor person unlucky enough to get stung.
 
But if you have a penny and a Band-Aid or some scotch or masking tape, you've got an easy, quick, and effective fix for the discomfort and swelling.
 
When someone gets stung, immediately wash and dry a penny (although if there's no place to clean a penny, I'd probably either spit on it and rub it dry on my clothes or just use it as is). Place the penny on the sting and tape it in place with the Band-Aid. Voila! That's all there is to it. Keep the penny taped on for several hours or overnight if possible, and when you take it off you'll notice there's no swelling. Several people in my little part of the world have used it successfully this summer (it's a dry year and we've had an extra mean yellow jacket population this summer), including my one-year-old granddaughter and a child who usually swells up pretty badly. Both of these wee ones were none the worse for wear by the next day after having worn the penny. Can't beat that for a success story.
 
But now we'll move on to the dark side of the Internet and it's fancy ideas. But first a bit of back story.

 
I pretty much spend my summer months either barefoot or in flip flops. The result is calloused feet that are hideous. While it's true that I don't much care what my feet look like (hey, I've reached "a certain age" and feet are the least of my worries!) I thought I'd try an idea for effortless soft feet that use ingredients I actually had around the house. And "everybody" seems to be ballyhooing this magic tonic, so what did I have to lose?
 
Here's the "recipe":
 
1 part white vinegar
1 part Listerine
2 parts warm water
 
Mix the ingredients together in a bowl large enough to get your feet inside and then soak your feet for 10-15 minutes. Wipe dry "and the tough skin will practically fall off!" according to one perky blogger.
 
Oh, boy, I thought! Dainty soft feet! Skin as smooth as a baby's bottom! This I've got to try!
 
 
Yeah, right.
 
Now to be fair, I got back on the Internet after my dismal failure and noticed that some acolytes were extolling using a pumice stone after the skin softening soak, but others said a brisk rub with a towel was all you needed to get that tough old skin to slough off. I decided to use the towel (no pumice handy)...And I had absolutely no luck. Well actually, that's not exactly correct.
 
When I was finished soaking my feet I rubbed them so long and so hard that they started feeling a bit tender, but when I took a good look and feel I still had crocodile skin. I finally gave up in disgust and put my flip flops back on. And only then did I notice.
 
My feet--and especially my toes--had turned a hideous shade of blue. Oh good grief! For one wild moment I thought I'd have to wear shoes and socks no matter how hot the days gets. But then I came to my senses: You win some and you lose some, and if having blue feet isthe price to pay for my sweet little granddaughter having an easy time with her yellow jacket sting, I'll take blue feet any day.

Wednesday, August 13, 2014

Old-Fashioned Amish Made Egg Beater

I recently purchased an old-fashioned egg beater. Called the Country Beater, it's made by King's Manufacturing in Leola, PA by an Amish manufacturer. The Amish use many hand-operated kitchen tools and I figured they would turn out a great product. I wasn't disappointed.

The Country Beater has stainless steel beaters and die cast gears and has a one-year warranty. If you know anything about antique egg beaters, you'll be pleased to know that it's built on the design of the old Dazee egg beaters. This is a workhorse!


I wanted to put it through its paces, so I promptly started beating things. I beat eggs and whipping cream and they both worked up incredibly easily. No surprise there.

The whipped cream took about three times longer than if I used electric hand beaters, but it was easy work and I probably could have gotten the cream whipped sooner if I had turned the beater handle faster. But I was in no hurry and took my time so I could watch the beating action. It was rather mesmerizing.


Next I decided to whip up a batch of buttermilk pancakes and they were easy-peasy as well:

Flush with easy success I decided to make mashed potatoes and use the egg beater. Ha! I did manage to mash the potatoes but what price glory! I first had to sort of smash the potatoes so they would go through the beaters. This, in my mind at least, somewhat negated the need for the beaters in the first place. I think I would have been better off using my old-fashioned potato rice/masher (which I love), and I plan on doing that in the future.

But all in all, I love my new egg beater. It's very well made and sturdy and I love that it's stainless steel and not aluminum. The beater portion is deep so you can process a large amount of food at one time, and the gear works are smooth. Although it's dishwasher safe, I've washed mine by hand and it's no problem at all to get the blades totally clean.

Would I recommend one? Yes--without hesitation I'd recommend the Country Beater. However, the price is steep so you'd best really want one before you plunk down the money. At $69.95 it's not something you'd purchase on a whim.

There are cheap egg beaters on the market and they will probably do just fine if you only plan to whip up a few scrambled eggs every once in a while. But if you want a serious manual egg beater, go with the Country Beater. You won't be sorry.

Now if you'll excuse me, I think I'll go whip up a cake.

Blessings!
Georgia
UPDATE: Here's a photo that better shows the heavy0duty metal gears. This egg beater has held up so well!

Wednesday, August 6, 2014

My Latest Book!

Hello, all! And a good morning to you.

It's hot here in the Pacific Northwest...well, at least we think so! We've been in the 90s for several weeks now, and that's considered hot, hot, hot. But with all this sunshine and warmth, the gardens are abundant (if we remember to water regularly) and harvest and canning season are upon us in earnest. I love this time of year, although I could do without quite so much heat.

I'm happy to announce that my latest cookbook is due out in just a few weeks--September 1, to be exact. I've written this book with  friend and fellow baker, Kathleen Kerr, and I'm confident you'll find lots of great recipes inside, no matter what your need or tastes might be. And with more than 300 recipes included, you'll be sure to find just the right goodie for any occasion.


Now isn't that a great-looking cover? Makes me want to stop right now and bake something! You can order the book at any of the usual online "book stores," such as www.amazon.com, www.christianbook.com, www.barnesandnoble.com, and in stores all across the country.

And don't forget to pick up a copy of my canning cookbook. Because after all--it's the season!

May you and your loved ones be blessed.

Georgia

Sunday, July 27, 2014

Caramel Corn with Peanuts--An Old-Fashioned Treat

I'm going to share with you a family favorite for our homemade version of "Cracker Jacks." Now, if you're not a fan of peanuts or have an allergy to them, you can use another variety of nut or leave them out altogether. Any way you choose, this caramel corn is delicious!

Ingredients:

6 quarts popped corn (about 3/4 cup unpopped corn)
1 cup peanuts (or other nuts), optional
1 cup butter
2 cups firmly packed brown sugar
1/2 cup corn syrup
1 tsp. salt
1/2 tsp. baking soda

Preheat oven to 250 degrees.

Butter or spray with oil a very large mixing bowl and two rimmed large jelly roll pans.

Place the popped corn into the greased mixing bowl and set aside for now.

In a medium saucepan combine the butter, brown sugar, corn syrup, and salt. Bring to a boil over medium heat, stirring constantly. Lower heat and let the mixture boil for 5 minutes without stirring.

Caramel boiling in saucepan


Remove saucepan from heat and stir in the baking soda. (When you add the baking soda, the syrup with froth and grow for a few moments so don't be concerned when your syrup temporarily acts like a mini volcano.) Gradually pour the syrup over the popped corn, mixing well to coat all the kernels. (I use a very large wooden spoon and it seems to work well.) Spread the caramel corn evenly into the two prepared jelly roll pans. Bake the caramel corn for up to an hour, stirring every 15 minutes.


This is such a delicious, old-fashioned treat. It's a great take-along treat in the summer and equally good on a cold winter evening when you and your loved ones are curled up under a blanket or enjoying a cozy fire together.

I hope you give it a try soon. I think you'll be so glad you did!

Blessings,
Georgia