Monday, December 15, 2014

Pistachio Cream Dessert

I've been messing around in the kitchen a lot lately because I'm writing yet another cookbook. The dessert I'm going to share with you today is a result of those kitchen endeavors.

For some reason I can't possibly fathom I've been fond of the idea of making Jell-O and/or pudding desserts. They just seem so old-fashioned, easy, and kid-friendly. And with an ever-growing passel of little ones in the Varozza clan, it seemed somehow fitting that I explore this tangent.

So today, I'm going to share with you Pistachio Cream Delight:


Pistachio Cream Delight


First Layer:
1 cup walnuts, finely chopped
2 cups flour
1 cup (2 sticks) butter, room temperature

Mix together all ingredients and press into a 9 x 13-inch baking pan. Bake at 350° for 15 minutes; cool completely.
Here's what the baked crust layer looked like when I pulled it from the oven:
I wasn't too impressed, but I kept on going. I soothed myself by thinking that the other layers would soon hide this lumpy, bumpy crust. (Which, by the way, turned out tasting delicious!)
 
Second Layer:
4 oz. cream cheese
1 cup powdered sugar
1 cup whipping (heavy) cream, sweetened and whipped until soft peaks form (I used about 1 tablespoon sugar and a small amount of vanilla)

Cream together the cream cheese and powdered sugar until smooth. Fold in whipped cream, blending well. Spread evenly over cooled crust.

Third Layer:
2 3½ -oz. boxes instant pistachio pudding
2¾ cups cold milk
1 tsp. vanilla

Mix together all ingredients and beat for 1-2 minutes. Spread over the top of the cream cheese mixture. Refrigerate.
 
When ready to serve, you can top with more sweetened whipped cream and sprinkle on some chopped walnuts or pistachios if desired.
 
I know I began this post with a picture of my piece, but it doesn't hurt to end things with the delicious results. Because it was delicious, and so easy that it's the perfect church/family potluck item to whip up in your spare time.
May you and your loved ones, whatever shape that takes in your life and circumstances, be blessed this Christmas season. And may you learn to spot joy in even the most unlikely of places during this time. Were I to ask one thing of you, it would be this: Please, open the eyes of your heart and show love and grace to someone it might be easy to pass by--to not "see." Christmas is the date we have set aside to celebrate the birth of the Christ Child. Let us show our love and reverence for His great work on our behalf by being his hands and feet to those less fortunate. Together we can accomplish so much!
 

Tuesday, December 9, 2014

Chocolate Candy Cane Cake Recipe--Perfect for the Holidays!


Cooks seem to do their best work during the holidays, making mouthwatering dinners and baking delectable treats--many of them tried and true family traditions. That is certainly true at my house, and the Christmas season just wouldn't seem complete without my Chocolate Candy Cane Cake. I wait all year to make this treat because even though you can use any hard peppermint candy, I think that candy canes are the only thing to use. And because of that, I must wait patiently until candy canes are available in stores. And that comes only once each year. But because I'm required to wait, the resulting cake seems extra special.
Even though this cake is made from scratch, it's not difficult and goes together well. And the result? Well! The cake itself is moist and very chocolaty, but with a subtle peppermint undertone. And the frosting? Oh my word but it's tasty! In fact, the frosting could be made for any cake you want; just leave out the peppermint candy (or not!).
Here goes:

Chocolate Candy Cane Cake. Yum!


Chocolate Candy Cane Cake

cup butter, room temperature

1 cups granulated sugar

3 eggs

2 cups flour

cup cocoa powder

1¼ tsp. baking soda

¼ tsp. baking powder

1 tsp. salt

1 cups milk

½ cup crushed peppermint candy canes (or other hard peppermint candy)

Chocolate Peppermint Frosting (recipe below)


Grease and flour two cake pans; set aside for now.

In a large mixing bowl, cream together the butter, sugar, and eggs until well mixed and smooth; then beat on high speed for 3 minutes more.

Mix together the flour, cocoa powder, baking soda, baking powder, and salt; add to creamed mixture alternately with the milk, blending well after each addition. Blend in the crushed candy canes.

Spread batter evenly between the two cake pans and bake in a preheated 350° oven for 35 minutes. Cool for 10 minutes before slipping cakes from pan and allow them to cool completely before frosting them with chocolate Peppermint Frosting.

Chocolate Peppermint Frosting

½ cup butter

½ cup cocoa powder

3 cups powdered sugar

7 T. milk

1 tsp. vanilla

1 T. crushed candy canes

In a medium saucepan, melt the butter; stirring constantly. Add the cocoa powder and cook for about 1 minute until smooth; remove from heat. Beat in the powdered sugar and milk and continue beating (I do this by hand with a large wooden spoon or rotary egg beater) until mixture is smooth and of spreading consistency; add the vanilla and crushed candy canes and beat again until smooth. Spread between the layers and all around the top and sides of Chocolate Candy Cane Cake.

 I hope you give it a try. Your friends and family will be well pleased!

I pray that during this holiday season, you and your loved ones will experience deep and abiding joy and peace. Resist the urge to do too much, and turn away from the crass commercialism and resulting stress that come from overspending. It may not always be easy to go against the tide, but trust your heart and concentrate instead on the holiness of the birth of our Lord and Savior. Spend time with those you love. Remind others of all the ways they are special. Meditate on what you have to be thankful for. Be extravagant with your hugs and kind words. Those are gifts that will be cherished!

Have a merry and blessed Christmas!

Georgia

Wednesday, November 5, 2014

Sugared Fresh Cranberries Recipe

Lately, here and there (like on Pinterest) on the Internet, I've come across sugared cranberry recipes. Then I got a pound of Bandon, Oregon cranberries and thought this would be the perfect time to try my own concoction based on what I've been seeing around. Here's what I came up with:

Lovely, tasty sugared cranberries!

And here's how I did it:

Sugared Fresh Cranberries

12 oz - 1 lb. (16 oz.) fresh cranberries, washed
1 1/4 cups granulated sugar, divided
1/2 cup water

In a medium saucepan, mix together 1/2 cup of the sugar and water. On medium heat and stirring constantly, heat the syrup until the sugar has dissolved; remove from heat.

Place the cranberries into the syrup and gently mix so all surfaces of the berries have been coated with the syrup. This won't take more than about 30 seconds because you don't need to cook them; rather, you just want to coat them.

Coating cranberries with warm sugar syrup

Using a slotted spoon, remove the berries from the syrup and place them on a rack to dry for one hour. You may need to work in batches if they don't all fit into the pot you use.

Cranberries draining
As you might be able to discern in the photo above, my makeshift draining rack was pretty hokey, and the drain holes were so big that some of the cranberries fell through to the paper-towel-covered counter. As it turns out, that didn't prove to be a problem at all. (Thankful for that!)

After the cranberries have sat for an hour they should be tacky to the touch. Now, working in batches, roll the berries in the remaining 3/4 cup of sugar; place the sugared berries in a single layer back onto the rack or use a large jelly roll pan or some other low-sided baking pan. Let them sit for another hour or so before you store them. I stored mine in a large mixing bowl with an old-fashioned plasticized cloth covering. (I figured the cloth covering would allow a bit of air to circulate and my thinking for that was I didn't want the sugar to get soft, which seemed likely were I to use plastic stretchy wrap instead.

Now the only thing left to do was eat them! So I did, and they were oh, so good. :)

Sugared Cranberries close-up

I hope you give this easy recipe a try. They are rather an addicting snack when eaten plain, but I'm going to try them in a tossed green salad tonight for supper. I imagine they will be fabulous. I'll splash on oil and vinegar to dress the leaves and throw in a handful of blue cheese crumbles. Yum!

May God be with you and yours!

Georgia

Tuesday, November 4, 2014

eBook Deals on Two of My Books from Harvest House Publishers!

Hello, all-

First of all, I'd like to tell you why it's been more than a week since you last heard from me...because it's such terrific news that I'm about to bust!

One of my sons/daughters-in-law just had their third baby--a boy who is the spitting image of his three-year-old big brother. Uncanny how alike they look! Both of them are handsome little fellows and I was smitten the moment I laid eyes on him. Babies fresh from heaven--there's no better feeling!

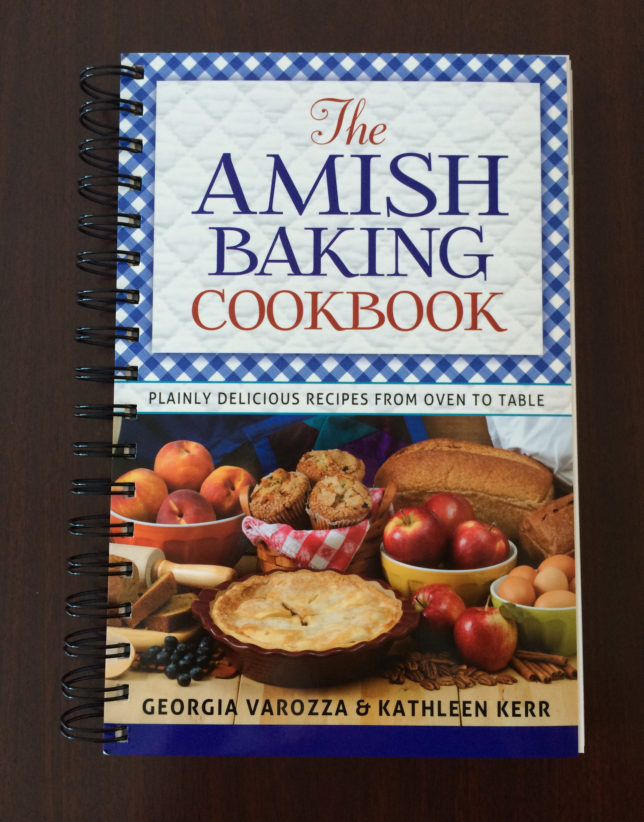
So now let's get down to the reason for my post today. My publisher, Harvest House Publishers, has an e-book deal going on and two of my cookbooks are featured: The Homestyle Amish Kitchen Cookbook (a perennial favorite with readers and offered at $1.99 today through December 2) and The Amish Baking Cookbook (my newest release, offered at $3.99 from today through December 2).
Here's the link:

http://harvesthousepublishers.com/ebook-deals/

If you're an e-book user these are cheap, cheap prices so take advantage of the deal. You can call it an early Christmas present to yourself. Because you're worth it. :)

Hope you have a lovely day and remember: God adores you!

Blessings to you and yours,
Georgia

Saturday, October 18, 2014

The Best Gingerbread Recipe Ever!

Fall has arrived with a vengeance, and that always means (for me at least) a change in my taste desires. I start craving hearty stews, mashed potatoes, anything with pumpkin, and homemade hot chocolate in the evening. So the fact that I'm sharing this particular recipe with you today only makes seasonal sense!

The gingerbread recipe I'm about to share with you is so outstanding that you could make a believer out of a confirmed gingerbread hater with this one.

Seriously.

It's feather light and not too spicy, but the classic taste still shines through. And when you eat it warm with whipped cream or vanilla ice cream? Words fail!


By the way, this recipe will appear in another Amish cookbook I wrote that is due on store shelves  sometime next year (99 Favorite Amish Recipes). But before that cookbook debuts, you can always satisfy your sweet tooth with my newest book, which was published last month:


And before my next cookbook arrives, I'll have this book available for sale at the beginning of the year:

It just went off to the printer, and I'm excited as I wait to get my first copies!

But okay...back to the gingerbread recipe.

Gingerbread

(Yes I know... that's a scintillating name for this recipe!)

1/2 cup (1 stick) butter
1/2 cup boiling water
1/2 cup brown sugar
1/4 cup honey
1/2 cup molasses
1 egg, well beaten
1 1/2 cups flour
1/2 tsp. salt
1/2 tsp. baking powder
1/2 tsp. baking soda
3/4 tsp. ginger
3/4 tsp. cinnamon
1/4 tsp. allspice

In a mixing bowl or stand mixer, pour boiling water over the butter; add the brown sugar, honey, molasses, and egg. Beat well.

Add sifted dry ingredients and beat until well mixed and smooth.

Pour batter into a greased and floured 8-inch square pan and bake at 375 degrees for 25 minutes; do not over-bake.

Allow the gingerbread to sit in the pan for several minutes before attempting to cut into pieces.


Oh, be still my heart! Of course I ate that lovely piece I showed you at the beginning of this post while I wrote this. I felt I should do a bit of recipe testing because I owe it to you, my dear readers, to make sure everything is shipshape. But I realized pretty early into the "testing" that I wasn't going to be able to make a definitive decision as to whether I had used hyperbole when calling it "The Best Gingerbread Recipe Ever," so of course I'll need to make myself a cup of coffee and have another piece. Just to make sure. I tell you, recipe blogging is a tough business.

Now if you'll excuse me, I've got some coffee to go make.

Blessings to you and yours.
Georgia


Sunday, October 5, 2014

Are There New Guidelines for Safely Using Canning Lids?


BPA-free banner and USA flags appear on newer boxes.
BPA-free lids have a "Made in USA" banner in upper right corner.

For the last number of months I've heard scuttlebutt about new guidelines coming from the Ball/Kerr company (now combined and going under the name of Jarden Corporation). What I heard over and over again was that when the lids became BPA-free (around 2013, I think), it was no longer necessary to sterilize the lids before using them--and in fact, if you did sterilize them, there was the likelihood that the softer sealing compound would thin to the point that a safe seal might not occur.

But these rumors came during the height of canning season and I frankly didn't allot the time necessary to check into things...until now.

I tend to be conservative in my canning methods and realize that many folks home-can using older recipes without any problem. But that's not my style. I figure that if the time and energy (not to mention funds) were spent to come up with these guidelines, I'd do well to notice. And I'm so glad I did! As it turns out, I had a hazy picture at best of what I was hearing.

Canning lids are metal "rounds" that cover something called Plastisol on the underside. Around the edge of the underside of each lid is the reddish rubber sealing compound.

First let's discuss the Plastisol underside...but we have to go back all the way to 1969 to get the story. That was the year that the canning jar companies changed from using latex to Plastisol. Before 1969 the recommendation was to sterilize the lids in boiling water and remove them from the water only when ready to use. The reason why? Because latex-based lids needed that softening action that came from boiling. But when the softer Plastisol was used, it was no longer necessary to boil them. So why did we continue to boil our lids?

As well as I can figure, it was mostly a result of poor communication between the canning lid companies and the public. (And the university extension services did nothing to shed light on the process I might add.)

Now move forward to about 2013. This was when Jarden announced that their canning lids were now being manufactured BPA-free. At that time there were clarifications made about safely handling the lids, which seems to me to have been merely coincidental in timing.

The new guidelines tell us we can simply wash and rinse our lids and keep them at room temperature until ready to use. But they also tell us that if we continue to simmer--not boil--our lids at 180 degrees (which many of us have been doing for years) we won't be overheating the lids and possibly contributing to seal failures. In other words, simmer away if that's your bent.

One more piece of good news (which really isn't "news," but has also come to the forefront of late) is that if we water-bath or pressure can our jars for 10 minutes, we don't need to sterilize the jars before filling. Personally, I think this is the best news of all. Sterilizing those jars was always a real pain, and I'd often resort to just washing them in my dishwasher and then feel guilty that I was cutting corners. But as it turns out, I was just fine. What a relief!

So has anything really changed as far as how I process food? Not really. But it is nice to know that I've been in the forefront of correct safe food processing without even knowing it. Before I called it cutting corners. Now I can call it leading edge. Ha!

Blessings to you and yours. May these lovely fall days be filled with the comforts of home and hearth!
Georgia


P.S.--These thoughts are my own. If I have inadvertently misstated anything, it's my doing alone, and I apologize!

Friday, October 3, 2014

The Amish Baking Cookbook (giveaway!)

Here's another chance to win my latest book, written with Kathleen Kerr!


And here's the link for the giveaway! http://bit.ly/1rQTiLA
The website is Amish Wisdom and it's a wonderful site, filled with lots of good stuff. Enjoy!