Saturday, October 18, 2014

The Best Gingerbread Recipe Ever!

Fall has arrived with a vengeance, and that always means (for me at least) a change in my taste desires. I start craving hearty stews, mashed potatoes, anything with pumpkin, and homemade hot chocolate in the evening. So the fact that I'm sharing this particular recipe with you today only makes seasonal sense!

The gingerbread recipe I'm about to share with you is so outstanding that you could make a believer out of a confirmed gingerbread hater with this one.

Seriously.

It's feather light and not too spicy, but the classic taste still shines through. And when you eat it warm with whipped cream or vanilla ice cream? Words fail!


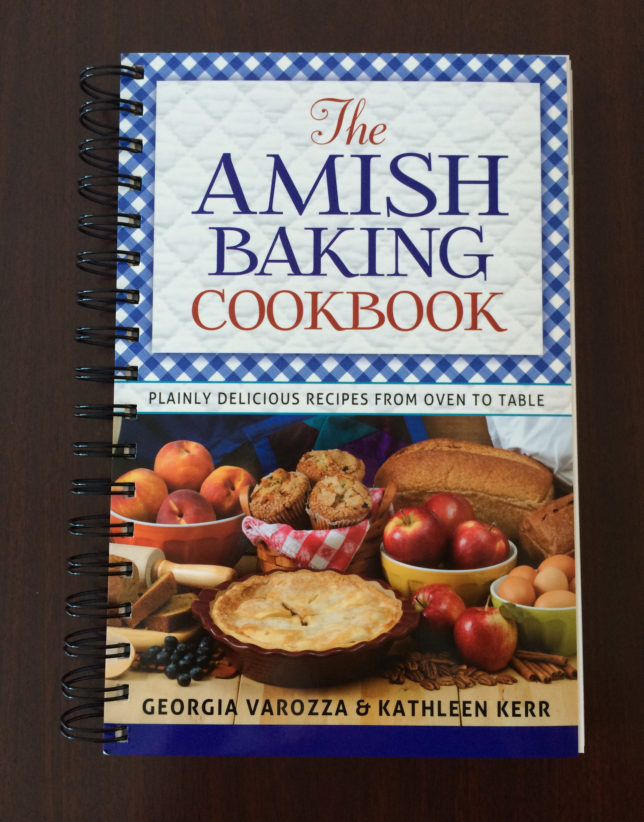
By the way, this recipe will appear in another Amish cookbook I wrote that is due on store shelves  sometime next year (99 Favorite Amish Recipes). But before that cookbook debuts, you can always satisfy your sweet tooth with my newest book, which was published last month:


And before my next cookbook arrives, I'll have this book available for sale at the beginning of the year:

It just went off to the printer, and I'm excited as I wait to get my first copies!

But okay...back to the gingerbread recipe.

Gingerbread

(Yes I know... that's a scintillating name for this recipe!)

1/2 cup (1 stick) butter
1/2 cup boiling water
1/2 cup brown sugar
1/4 cup honey
1/2 cup molasses
1 egg, well beaten
1 1/2 cups flour
1/2 tsp. salt
1/2 tsp. baking powder
1/2 tsp. baking soda
3/4 tsp. ginger
3/4 tsp. cinnamon
1/4 tsp. allspice

In a mixing bowl or stand mixer, pour boiling water over the butter; add the brown sugar, honey, molasses, and egg. Beat well.

Add sifted dry ingredients and beat until well mixed and smooth.

Pour batter into a greased and floured 8-inch square pan and bake at 375 degrees for 25 minutes; do not over-bake.

Allow the gingerbread to sit in the pan for several minutes before attempting to cut into pieces.


Oh, be still my heart! Of course I ate that lovely piece I showed you at the beginning of this post while I wrote this. I felt I should do a bit of recipe testing because I owe it to you, my dear readers, to make sure everything is shipshape. But I realized pretty early into the "testing" that I wasn't going to be able to make a definitive decision as to whether I had used hyperbole when calling it "The Best Gingerbread Recipe Ever," so of course I'll need to make myself a cup of coffee and have another piece. Just to make sure. I tell you, recipe blogging is a tough business.

Now if you'll excuse me, I've got some coffee to go make.

Blessings to you and yours.
Georgia


Sunday, October 5, 2014

Are There New Guidelines for Safely Using Canning Lids?


BPA-free banner and USA flags appear on newer boxes.
BPA-free lids have a "Made in USA" banner in upper right corner.

For the last number of months I've heard scuttlebutt about new guidelines coming from the Ball/Kerr company (now combined and going under the name of Jarden Corporation). What I heard over and over again was that when the lids became BPA-free (around 2013, I think), it was no longer necessary to sterilize the lids before using them--and in fact, if you did sterilize them, there was the likelihood that the softer sealing compound would thin to the point that a safe seal might not occur.

But these rumors came during the height of canning season and I frankly didn't allot the time necessary to check into things...until now.

I tend to be conservative in my canning methods and realize that many folks home-can using older recipes without any problem. But that's not my style. I figure that if the time and energy (not to mention funds) were spent to come up with these guidelines, I'd do well to notice. And I'm so glad I did! As it turns out, I had a hazy picture at best of what I was hearing.

Canning lids are metal "rounds" that cover something called Plastisol on the underside. Around the edge of the underside of each lid is the reddish rubber sealing compound.

First let's discuss the Plastisol underside...but we have to go back all the way to 1969 to get the story. That was the year that the canning jar companies changed from using latex to Plastisol. Before 1969 the recommendation was to sterilize the lids in boiling water and remove them from the water only when ready to use. The reason why? Because latex-based lids needed that softening action that came from boiling. But when the softer Plastisol was used, it was no longer necessary to boil them. So why did we continue to boil our lids?

As well as I can figure, it was mostly a result of poor communication between the canning lid companies and the public. (And the university extension services did nothing to shed light on the process I might add.)

Now move forward to about 2013. This was when Jarden announced that their canning lids were now being manufactured BPA-free. At that time there were clarifications made about safely handling the lids, which seems to me to have been merely coincidental in timing.

The new guidelines tell us we can simply wash and rinse our lids and keep them at room temperature until ready to use. But they also tell us that if we continue to simmer--not boil--our lids at 180 degrees (which many of us have been doing for years) we won't be overheating the lids and possibly contributing to seal failures. In other words, simmer away if that's your bent.

One more piece of good news (which really isn't "news," but has also come to the forefront of late) is that if we water-bath or pressure can our jars for 10 minutes, we don't need to sterilize the jars before filling. Personally, I think this is the best news of all. Sterilizing those jars was always a real pain, and I'd often resort to just washing them in my dishwasher and then feel guilty that I was cutting corners. But as it turns out, I was just fine. What a relief!

So has anything really changed as far as how I process food? Not really. But it is nice to know that I've been in the forefront of correct safe food processing without even knowing it. Before I called it cutting corners. Now I can call it leading edge. Ha!

Blessings to you and yours. May these lovely fall days be filled with the comforts of home and hearth!
Georgia


P.S.--These thoughts are my own. If I have inadvertently misstated anything, it's my doing alone, and I apologize!

Friday, October 3, 2014

The Amish Baking Cookbook (giveaway!)

Here's another chance to win my latest book, written with Kathleen Kerr!


And here's the link for the giveaway! http://bit.ly/1rQTiLA
The website is Amish Wisdom and it's a wonderful site, filled with lots of good stuff. Enjoy!

Sunday, September 28, 2014

Quick and Easy Homemade Cottage Cheese and Cottage Cheese Pancakes Recipe

It's fall. The trees are turning beautiful colors and the mornings are cool. I love the change in seasons, and even though it's hard to decide definitively, I think that autumn may be my favorite season. The busyness of summer is waning and the bone-aching cold and rain of winter hasn't yet set in. It's a great time for us to stand back, peruse our pantry shelves, and feel good about our efforts during the hot days of summer because our thrift and willingness to work means we can feed our families well during the coming months. I just love that feeling!

Today I'm going to share with you a "recipe" for making cottage cheese. It's quick and easy and, best of all, very tasty! And then I'll share a recipe for cottage cheese pancakes. They are delicious and easy to prepare as well. Can't beat that!


Cottage Cheese


1 gal. milk*
⅓ cup white vinegar
salt to taste

cream or half and half to taste

Pour the milk into a large, nonreactive pot (such as stainless steel) and slowly heat the milk to 180-190° F. (No need to stir.)
I use a thermometer to gauge the temperature.
 

When the milk has reached the proper temperature, remove from the heat and add the vinegar. Stir to mix and then let the mixture set for about 30 minutes or until the curds and whey completely separate.
Curds starting to form
 
Pour the curds and whey into a colander that has been lined with a double thickness of cheesecloth. Allow the whey to drain completely, about 15-30 minutes. From time to time you might have to lift the cheesecloth bundle to get the whey draining again as the colander can clog up. If just sort of life and shift the bundle and it seems to work.
Whey draining in colander leaving curds behind
 
Wrap the cheesecloth around the curds and rinse with cool tap water for several minutes, gently kneading the curds as you rinse.
Curds wrapped and ready to rinse
 
Drain again and then place the curds in a bowl. Add some cream or half and half if desired and salt to taste.
Oh boy! Cottage cheese!
 
Note: You can use the whey that's left behind in the cottage cheese making process to replace milk or water (there will be a lot!) in many recipes, such as biscuits, bread, cornbread, cooked oatmeal, and even smoothies. But remember that the whey from this recipe is acidic from use of the vinegar, so it will add a tangy taste to your food.

*In this recipe, low-fat or nonfat milk works well. I think it makes the curds “curdier.” I have no science to back this up...it's anecdotal. But that's been my experience.


Cottage Cheese Pancakes


1 cup cottage cheese
4 eggs
½ cup flour
¼ tsp. salt

¼ cup oil

½ cup milk

½ tsp. vanilla, optional

Mix together all ingredients until well blended and batter is smooth. Fry on lightly greased griddle or frying pan; leave plenty of room between pancakes for turning…and turn them quick because the batter is thin, but you’ll soon get the hang of it.

Cottage cheese pancakes frying. So tasty!
 
If you’ve ever eaten cheese blintzes or crepes, these pancakes will prove reminiscent. Not really a pancake, per se, these delicate pancakes make for an excellent light brunch or lunch when paired with a tossed green salad or a bowl of fruit. Or try them rolled around a bit of blackberry jam and then sprinkled with powdered sugar. I make these for breakfast, lunch, and sometimes even dinner because they’re just that good!

Well I hope your coming week will be an especially fine one, and I hope you can get outside to enjoy the lovely fall colors!

Blessings to you and your loved ones,
Georgia

Saturday, September 20, 2014

Homemade Chocolate Syrup (to Can)

The summer is beginning to wane...not that we can really tell around here because we continue to have hot days and warm nights. But there's just something in the air that lets me know that summer will soon be a memory. I'm pretty sure it has to do with the slant of the sun. And then of course when the days are getting noticeably shorter, it's easy to realize that we are headed into autumn...and then comes winter.

In the cooler months I love to drink my homemade hot chocolate. You can find my post with the recipe here:
https://www.blogger.com/blogger.g?blogID=7930746912146392794#editor/target=post;postID=2843674370395124971;onPublishedMenu=allposts;onClosedMenu=allposts;postNum=20;src=postname

It got me thinking that some chocolate syrup sitting on my pantry shelf would be nice too. I love the idea of being able to make things from what I keep stored, and I thought if I had some chocolate syrup, I'd be able to make a cup of hot chocolate using some reconstituted dry milk (if, for some reason, I didn't have any of my homemade mix handy), or I could drizzle it over some kind of sweet treat, or I could even use it for baking.

So I got onto the Internet and came up with my own version of...

Homemade Chocolate Syrup (to Can)

1 1/2 cups water
3 cups white sugar
1 1/2 cups cocoa powder
1 tsp. vanilla
1/4 tsp. salt
2 T. light corn syrup

In a mixing bowl, mix together the cocoa powder and salt; set aside for now. Get your jars sterilized and ready your lids and bands. I used 3 half-pint jars and had enough left over to almost fill a small 4-ounce jelly jar. I canned all of them even though the small jar wasn't full. It sealed fine, but I'll use that one first.

In a medium saucepan, whisk together the water and sugar. (I used a 3-quart pot and when I added the cocoa it really frothed and bubbled, so don't use anything smaller than 3 quarts!) On medium to medium-high heat, bring to a boil, whisking constantly. Once the sugar water boils, add the remaining ingredients and keep stirring. At this point, I turned down my heat a bit because for some reason the addition of the cocoa powder really gets things churning.

Continue whisking the mixture for about 15 minutes or so--you want to cook down the syrup a bit so it's thickened slightly.


At this point, you could use the syrup, or put it in a clean jar and refrigerate it for a week or so. But if you want to can the syrup, read on:

Ladle the syrup into your jars, using a funnel (that you've also sterilized!) and leaving 1/4 inch headspace. This is somewhat messy so once you've completed filling the jars, take a wet paper towel and do a good job of cleaning around the jar tops and threads. Place the lids on the jars and set them into a water bath canner that has hot (but not yet boiling) water in it.

Making sure that your jars are covered by at least 1 inch of water, process them in a water-bath canner for 15 minutes (begin timing once the water reaches a full rolling boil). At the end of the processing time, remove the cover to the canner and fish out your jars. Set them on a folded towel and you'll shortly hear the lids popping, letting you know that the seal is complete.

Don't move them until they are completely cool, and don't remove the bands until they've sat for at least 12 hours. Clean your jars with warm soapy water if they are sticky and put them on your shelf. Then stand back and admire your efforts!

Next time I plan on making a double batch because it seems to me that if I'm going to the trouble to can, I might as well make it worth my while. But for now I'm content. And I plan on having hot chocolate this evening, using some of my syrup, because I want to taste test the goods!

I hope you find this recipe useful and that you add to your stores for winter with this easy-to-make chocolate syrup. Even better? It uses shelf-stable ingredients you probably having sitting around. I love that!

Blessings to you and yours,
Georgia

P.S. - Be sure to get a copy of my latest book, The Amish Baking Cookbook. It's loaded with user-friendly, tasty recipes and will be a welcome addition to your collection!

e-Book Special--The Amish Canning Cookbook

Just a quick note to let you all know that the digital version of my canning cookbook is currently on a great discount...it's selling for a short time at only $1.99! What a deal! You can find the information/link at

http://harvesthousepublishers.com/ebook-deals/


Saturday, September 6, 2014

Corn Bread with Cheese and Bacon

Today is hot--it's over 90 degrees already, and the forecast is for continued hot weather this coming week, albeit with a slight cooling trend...hopefully staying in the 80s. But even so, I can feel the soon-coming turn of the seasons. Fall is just around the corner, no matter what the thermometer says.

Just this week I noticed that it was still pitch black outside when I woke up, while during the longest days of summer I can rarely beat the grey of early morning. And another thing that clues me in to the change in seasons is that I recently made my first batch of hot chocolate mix, which I only drink during the cooler months.

And then today, I got a terrible urge for chili and cornbread--again, something I'm not prone to eat during summer. So as a goodbye summer/hello autumn recipe, I'm going to share my cornbread recipe with you today. By the way, the recipe can be found in my latest book:

First of all, let's talk cornmeal. If at all possible, use freshly ground corn for your cornmeal. I'm a firm believer that cornmeal can go rancid quickly if left to sit on a shelf. But if grinding your own grain isn't something you do, then store your cornmeal in the refrigerator. That way it will last longer before turning. I do usually grind my own corn, but today I used an interesting heirloom variety that I got at our local Saturday Farmer's Market:
I've thought of growing this old-time variety and it was a pleasure to try it out first. It has a very corny taste, but isn't overpowering, even with the rich color. Here's a closer view of the ground corn so you can get an idea of what I'm talking about:
Now for the recipe:

Corn Bread with Cheese and Bacon

1 cup flour
1 cup cornmeal
1/2 cup instant dry milk
(or you could simply use 1 cup milk and leave out the water, which is listed below)
2 T. sugar
4 tsp. baking powder
1/2 tsp. salt
1/2 cup shredded Cheddar cheese
1/2 cup cooked, crumbled bacon (or use real bacon bits, which you can get in large bags for fairly cheap at Costco)
1 egg
1 cup water (which you'll leave out if you decide to use liquid milk instead of dry milk)
1/4 cup oil

Grease a 9 x 9-inch pan and set aside.(You could also get away with an 8 x 8-inch pan, but you may need to bake it a few minutes longer.) Preheat oven to 425 degrees.

In a large mixing bowl, combine the flour, cornmeal, instant milk, sugar, baking powder, and salt and stir to mix well. Add the cheese and bacon and stir well again.

In a medium bowl, beat the egg and then add the water and oil and mix until well blended. Stir this liquid mixture into the cornmeal mixture and beat by hand just until well blended and smooth. Pour batter into prepared pan. Bake at 425 degrees for 20-25 minutes or until done.

And this is the delectable result:
I think you'll love this recipe. It's hearty and tasty. But it's also just about foolproof, so if you want to add some finely chopped onions or peppers or what have you, go for it.

Obviously, cornbread teams well with chili, but it would also be good with soup or stew or even just a salad. Very versatile!

Try this recipe and see if your family loves it like my own family does. It's quick and easy and sure to please!

As the days of summer wind down and our thoughts and energy turn toward the coming cold months, I pray that you and your loved ones will be snug and well-fed throughout the season.

Blessings to you and yours,
Georgia