Friday, September 22, 2017

Arnica Salve Recipe

Arnica Salve for Bruising and Muscle Pain


Thankfully, I recently made a batch of Arnica Salve. Not more than a few days after I made the salve, I took a hard fall while stepping through the front door of my house with my arms full of heavy bags. My right knee and left elbow took the brunt of the tumble. I limped into the bathroom to inspect the damage, and my elbow and knee were already swelling and turning purple. (My left hip had some bruising too, but wasn't nearly as painful. Small graces!)

I gently but thoroughly rubbed on the salve, and kept this regimen up about four times a day for a week. Not only did it help with the bruising, but I felt as though it took some of the pain away for a time after each application.

Was I ever glad that I had this salve in my arsenal! And it's easy for you to do the same. Here's how I made it:

Arnica Salve

1 cup olive or coconut oil (I used a combination)
enough dried arnica flowers to completely infuse the oil
1/4 cup beeswax pellets (sometimes called pastilles)
essential oil of your choice (optional)
2 wide-mouth half-pint canning jars or other suitable containers, sanitized
2 lids for the half-pint jars (I use the plastic storage lids that Ball sells.)

If you have a double boiler, you're in luck--use that for this next part. But if you don't, do what I do. I use a smallish Pyrex mixing bowl that, when set on another saucepot, fits snugly with plenty of room underneath so I can add water. Voila! A DIY double boiler.

To the Pyrex mixing bowl, add the oil and arnica flowers, making sure that the oil is pretty much filled with the arnica. I imagine that if you use a half-cup, that would be plenty, but I usually use more. (This is based on my notion that the more arnica, the stronger the oil will be, but I have no idea if that's correct. Yet, it pleases me, so I do it.)

 Turn on the heat to about medium-low. You don't want to boil the oil, but rather, get it barely hot. Let the oil/arnica mixture sit there for about 45 minutes, stirring gently every so often, and turning the heat up or down as needed. Remember! Never let the oil mixture come to a boil.

Take the oil off of the heat and strain out the arnica using several layers of cheesecloth or a flour sack-type kitchen towel so all the bits are caught. Pour the strained oil back into the Pyrex mixing bowl or double boiler, add the beeswax, and on low heat, stir until the beeswax is melted. (This won't take long because the oil is already hot.)Once the beeswax is melted, add essential oil if using (I love lavender), stir it in, and then pour the salve into the prepared jars. Keep the lids off the jars until the salve has cooled and set up. Screw on the lids and store the salve in the bathroom, a cupboard, or even the fridge if your house is hot (like during a heat wave in summer and you don't have air conditioning).

Following are some handy links for online purchase of supplies:

Organic dried flowers, herbs, and much, much more at Mountain Rose Herbs.
Beeswax, essential oils, and lots more at Glory Bee
Canning jars and plastic lids can be found at Ball/Kerr canning supplies.
And then, of course, there's always Amazon.

Making your own salves and ointments is easy and so, so satisfying. I hope you try some today!

Blessings to you and yours,
Georgia, plain and simple

Saturday, April 29, 2017

5 Great Tasting Taco Recipes

I think tacos are great any day of the week. In fact, I love them so much, that rarely a week goes by that doesn't include tacos for at least one meal. I have a number of different recipes that I use to keep things interesting, and I want to share five of my ideas in this blog post.

We'll take a quick look at how to prepare five of my favorites: classic ground beef tacos, spicy shrimp tacos, sauteed scallop tacos, chicken fajita tacos, and pork and black bean tacos.

Classic Beef Tacos


1 lb. ground beef
1 onion, diced
2-4 T. chili powder
1/4 cup (more or less) water
1-4 T. chili powder (depending on how much heat you like and how hot your chili pepper is)
1 tsp. ground cumin
salt and pepper to taste
1/2 tsp. garlic powder or crushed garlic

For garnish: 
1 bunch fresh cilantro, snipped
1-2 tomatoes, chopped
1 cup shredded cheddar cheese
1 cup shredded Monterey pepper Jack

Spicy Shrimp Tacos with Pineapple Mango Salsa


3-5 large shrimp per serving, depending on size
Tony Chacere's Creole Spice
1 cup pineapple, diced
1 cup mango, diced
1/2 cup red bell pepper, diced
1 paste (also called plum) tomato, diced
2 green onions, chopped (use the white parts and part of the green parts)
2 T. lime juice
1 T. lemon juice
2 T. cilantro, plus more for garnishing
1 jalapeno pepper, finely chopped
corn tortillas

To make the salsa: Mix together the pineapple, mango, bell pepper, tomato, green onions, lime juice, lemon juice, cilantro, and jalapeno. Refrigerate while making the shrimp.

To cook shrimp: If the shrimp still have their tails on, gently grasp the meat near the tail end and pull; the shrimp should slide out of the tail. Sprinkle the Tony Chacere's Creole Spice onto the shrimp. (If you haven't before used this spice mix, know that's it's quite spicy, so use a light touch.) Heat a small amount of oil in a saucepan and cook the shrimp, turning once halfway through cooking. It should take only about 4 minutes to cook the shrimp. You'll know they're done when the meat turns white and pink.

Heat the tortillas, add the salsa, and top with shrimp. Add a bit more of the cilantro if desired.

Chicken Fajita Tacos


2 boneless, skinless chicken breasts, thinly sliced
1/2 red bell pepper, thinly sliced
1/2 yellow bell pepper, thinly sliced
1/2 green bell pepper, thinly sliced
1 small to medium onion, thinly sliced
1 tomato, chopped
3-4 T. chili powder, more or less, depending on taste
1/2 tsp. garlic powder
1/2 tsp. cumin
1/8 cup water
4 T. lemon or lime juice (or use a combination of the two)
corn tortillas
cilantro for garnish
cheddar cheese (optional)

In a saucepan on medium heat to which a small amount of oil has been added, sauté the chicken for several minutes, turning the pieces to get both sides. When most of the pink is gone from the meat, add the peppers and onion and continue to cook for about 5 minutes or until the peppers start to soften. Add the tomato, chili powder, garlic power, cumin, and water and sauce, stirring occasionally, until much of the water has evaporated and the peppers are cooked. Add the lemon/lime juice and cook for another few minutes until the juice has reduced somewhat

Heat the tortillas and spread the chicken mixture across the tortilla. Garnish with cilantro, and cheddar cheese if using.

Sautéed Scallop Tacos with Yogurt Lime Drizzle


about 6 small bay scallops per serving
thinly sliced cabbage
1 small onion, thinly sliced
avocado, peeled and sliced
1 cup plain yogurt
3 T. lime juice
1/2 tsp. cumin
1 clove garlic, minced
salt and pepper to taste
cilantro
corn tortillas

To prepare the yogurt lime drizzle: Mix together the yogurt, lime juice, cumin, garlic, salt and pepper, and some of the cilantro. Refrigerate until ready to serve.

If the muscles are still attached to the scallops, remove them. Rinse the scallops and pat them dry. Dredge them in flour and shake off excess. (You can also gently shake them in a baggie to coat.)

On medium-high, heat enough oil to cover the bottom of a saucepan. Sauté the scallops, turning to sear all sides. Cook just until done, which should only be about 4 minutes, but could be longer depending on the size of the scallops.

Heat the tortillas; layer on the cabbage, onions, avocado, and scallops. Drizzle with the yogurt lime sauce and garnish with cilantro.

Pork Tacos with Salsa Verde and Black Beans


This is a great meal to make on days when you're busy outside of the home because you can slow cook the meat and quickly finish up when you return home in the evening.

1 small boneless pork roast
1 small onion, chopped
1 jar salsa verde
1-2 cans black beans
corn tortillas
thinly shredded cabbage
shredded cheese, optional (Pepper Jack cheese is good, but you can use Monterey Jack or Cheddar)

Place the pork roast and onions in your slow cooker and cook according to the slow cooker's directions. When almost ready to serve, shred the pork using two forks; add the jar of salsa verde (you don't have to use the entire jar) and let the mixture heat up while you continue.

Place the undrained black beans in a saucepan and heat until the liquid is gently simmering and the beans are hot.

Heat the tortillas, spread the cabbage on top of the tortillas, next add the pork, and top with the black beans (use a slotted spoon to spoon out the beans so the liquid stays behind). Garnish with some cheese if using.

Well, there you have it. Five tasty taco recipes. Feel free to use these as a jumping-off point for your own creativity. You can use flour tortillas if you prefer, or add or delete ingredients to accommodate your family's unique taste preferences. I hope that you find a new family favorite from among these.

Blessings to you and yours!
Georgia, plain and simple

Sunday, December 11, 2016

The Easiest Way to Render Lard--Use a Slow Cooker!

Render Lard the Easy Way!

I was recently given about 8 pounds of hog fat by a friend of mine who had just butchered. My work schedule was currently hectic, and I knew it would be hard to find the time to laboriously cook and stir for hours to render out the lard. But in my opinion, cooking and especially baking with lard is the best, so I considered my options. Now, I've always rendered lard the old-fashioned way: on a stove top with large kettles. But I had read accounts of folks using their slow cookers instead of kettles, and one thing that had stuck in my memory was that you don't need to constantly be stirring the pot because cooking the hog fat on low in a slow cooker virtually guarantees no burning. I figured I'd give it a try, and I'm so glad I did because the results were spectacular!

Snow White Lard

Here's how to render out gorgeous, mild lard:

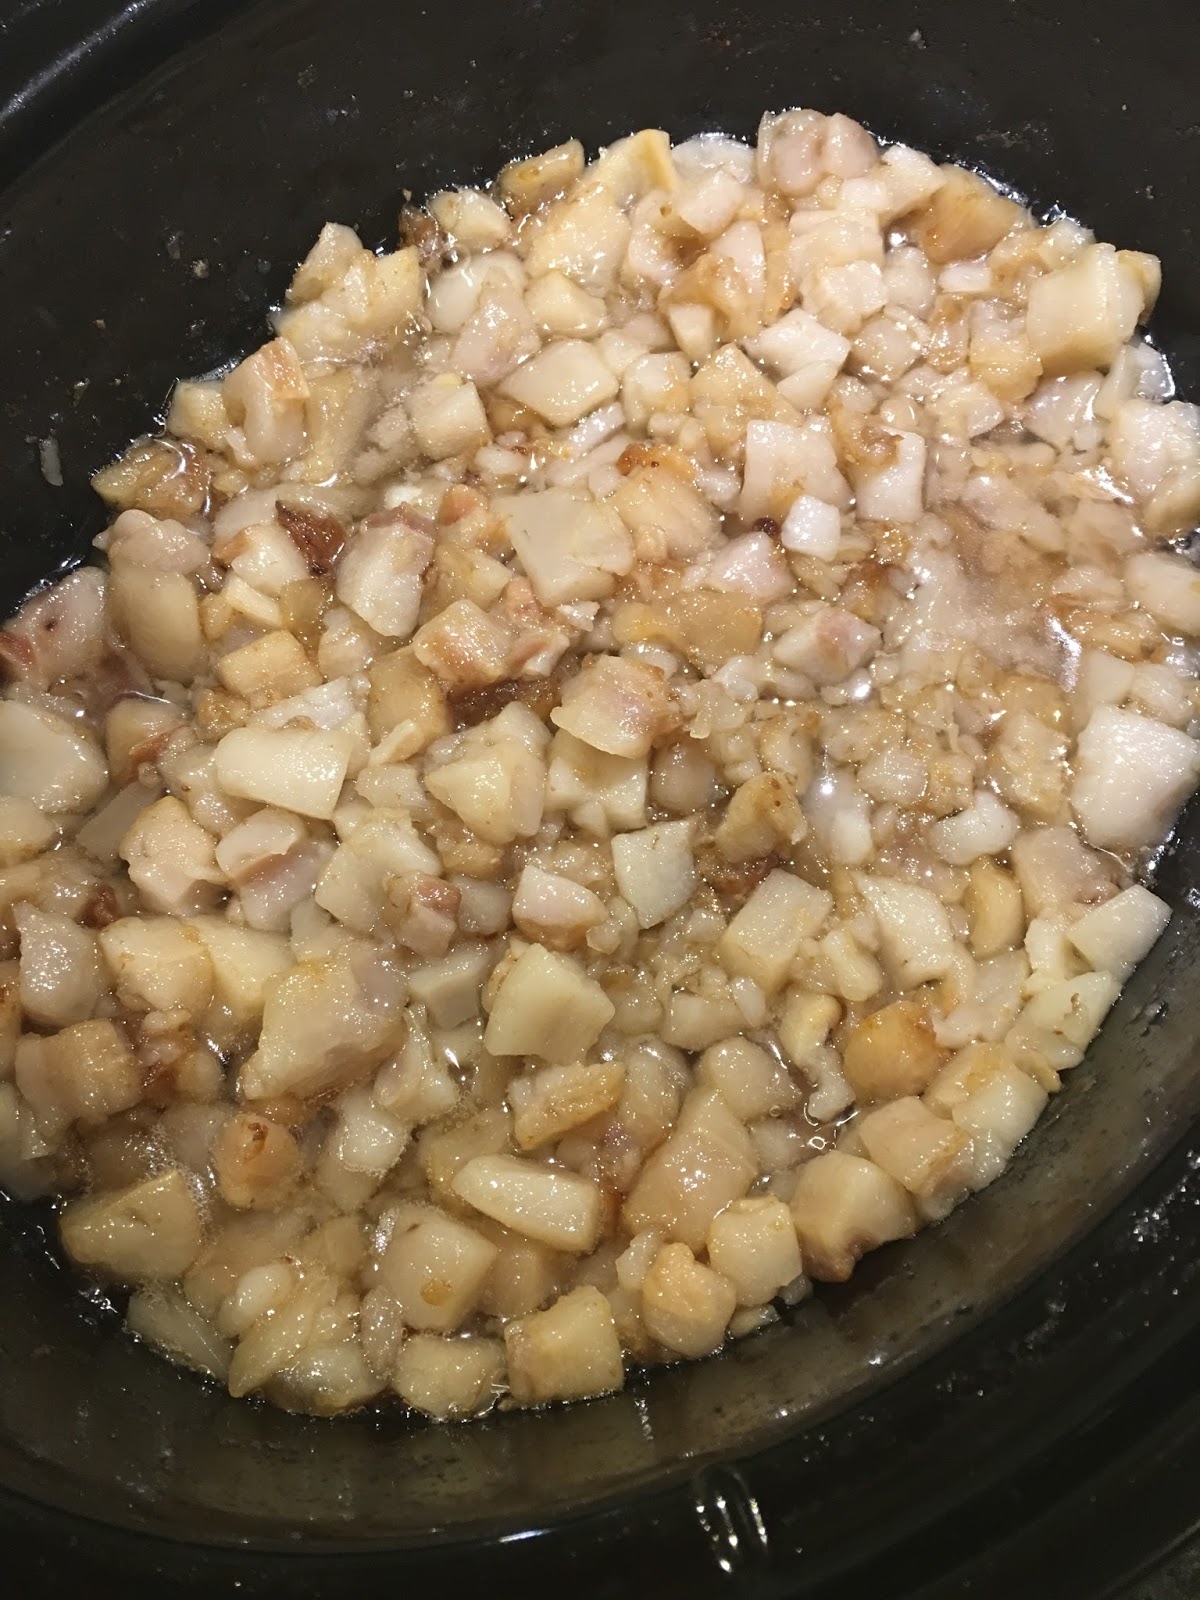
First, cut off much of the meat that might be still clinging to the fat (no need to obsess about this), and then cut the fat into small pieces, about 1 inch square. Place them in your slow cooker and add about 1/8 cup of water  (if you have a full pot of fat pieces), or possibly less if you don't have a full pot. You can start by turning the slow cooker on high to heat everything up, but move the setting to low after about 30-60 minutes and keep it on low for the rest of the time.

Here's what mine looked like:
Pieces of hog fat in my slow cooker beginning to melt.
From time to time I stirred the pot and cocked the lid of my slow cooker so the water would evaporate over time. After about only 3 hours I began the process of pulling off the lard. Basically you can either pour or ladle out the melted fat and filter it through a colander that has been lined with several layers of cheesecloth:
Filtering the lard
I continued to filter the lard as the fat melted. Prior to beginning the process, I sanitized pint-and-a-half canning jars so they would be ready when I needed them. (I'm currently low on quart jars or I would have used them instead. But use whatever you have because the size doesn't matter.)

Just keep up with this process until you aren't getting anymore melted fat and what's left in the slow cooker has turned brown. Those brown chunks are cracklings, and lots of folks eat them and consider them a real treat. I just spread out the cracklings on large baking sheets, give them a shake of salt, and then bake them in a 350 degree oven for about 20 minutes, stirring them once or twice while they are crisping up.
Cracklings!
That's all there is to it. And when you're done, treat yourself to the best pie crust or biscuits you've ever tasted. Simply substitute the lard for Crisco in your favorite recipe. Heaven on earth!
Lard, ready to refrigerate and use when needed.

If you don't raise your own hogs, check around in your community to see if you can find a local hog farmer who might be willing to give you fat,  sell it to you, or let you take it if you give him or her half of the lard that you render. Alternatively, if you have a local meat processor or market, they might have hog fat to give or sell to you also.

Wednesday, September 28, 2016

Vegetable Gardening in My Front Yard


It has been quite a summer, and the Lilliputian Cottage is thriving!

I made the decision to tear up my front yard and grow vegetables, fruit, and flowers there. I think it has been a good decision. And an added bonus is that I've met many new neighbors who regularly stop by to chat, ask questions, and visit. Their stories are interesting and varied...and sometimes quite poignant. It gives me the chance to spread a bit of joy and encouragement as well as good, freshly harvested veggies.

One story in particular stands out to me. There is a young lady who walks by my house on her way to the library, pushing a baby stroller that holds her beloved dog. She is neurodiverse. She always stops and talks if she sees me outside, and early in the season she told me more than once that she loves cucumbers. So, when my cucumbers began to ripen, I invited her into the garden and we picked all the cucumbers that were ripe. I picked some other veggies for her, and she left for home with a big shopping bag filled with produce--all of it fresh and at its best and grown with no pesticides, etc. She was so thrilled! She has been back several times, asking if my cucumbers are ready to pick again. We have had to come to an understanding that we need to share! But it pleases me that we have become friends after a fashion.

Like everything at the Lilliputian Cottage, my front yard isn't all that large. But it had two monster fir trees that overwhelmed the yard. The roots wandered underground all the way to my house, and they went under the sidewalk and, I'm sure, under the street as well. They were just plain old too big for the space. And I worried every time a strong wind came up that they'd crash into my tiny house. So I got permission from the city to take them down, and that's what I did last fall.
The second tree is coming down!
Getting ready to dig up the yard

As you can imagine, the mess was something else. One of my sons got an obviously very nice friend of his to buck and move the wood to my backyard, and then I had a company come in and start digging up roots. They filled up two monster dump trucks and didn't get nearly all of them. But it made a huge difference nonetheless.

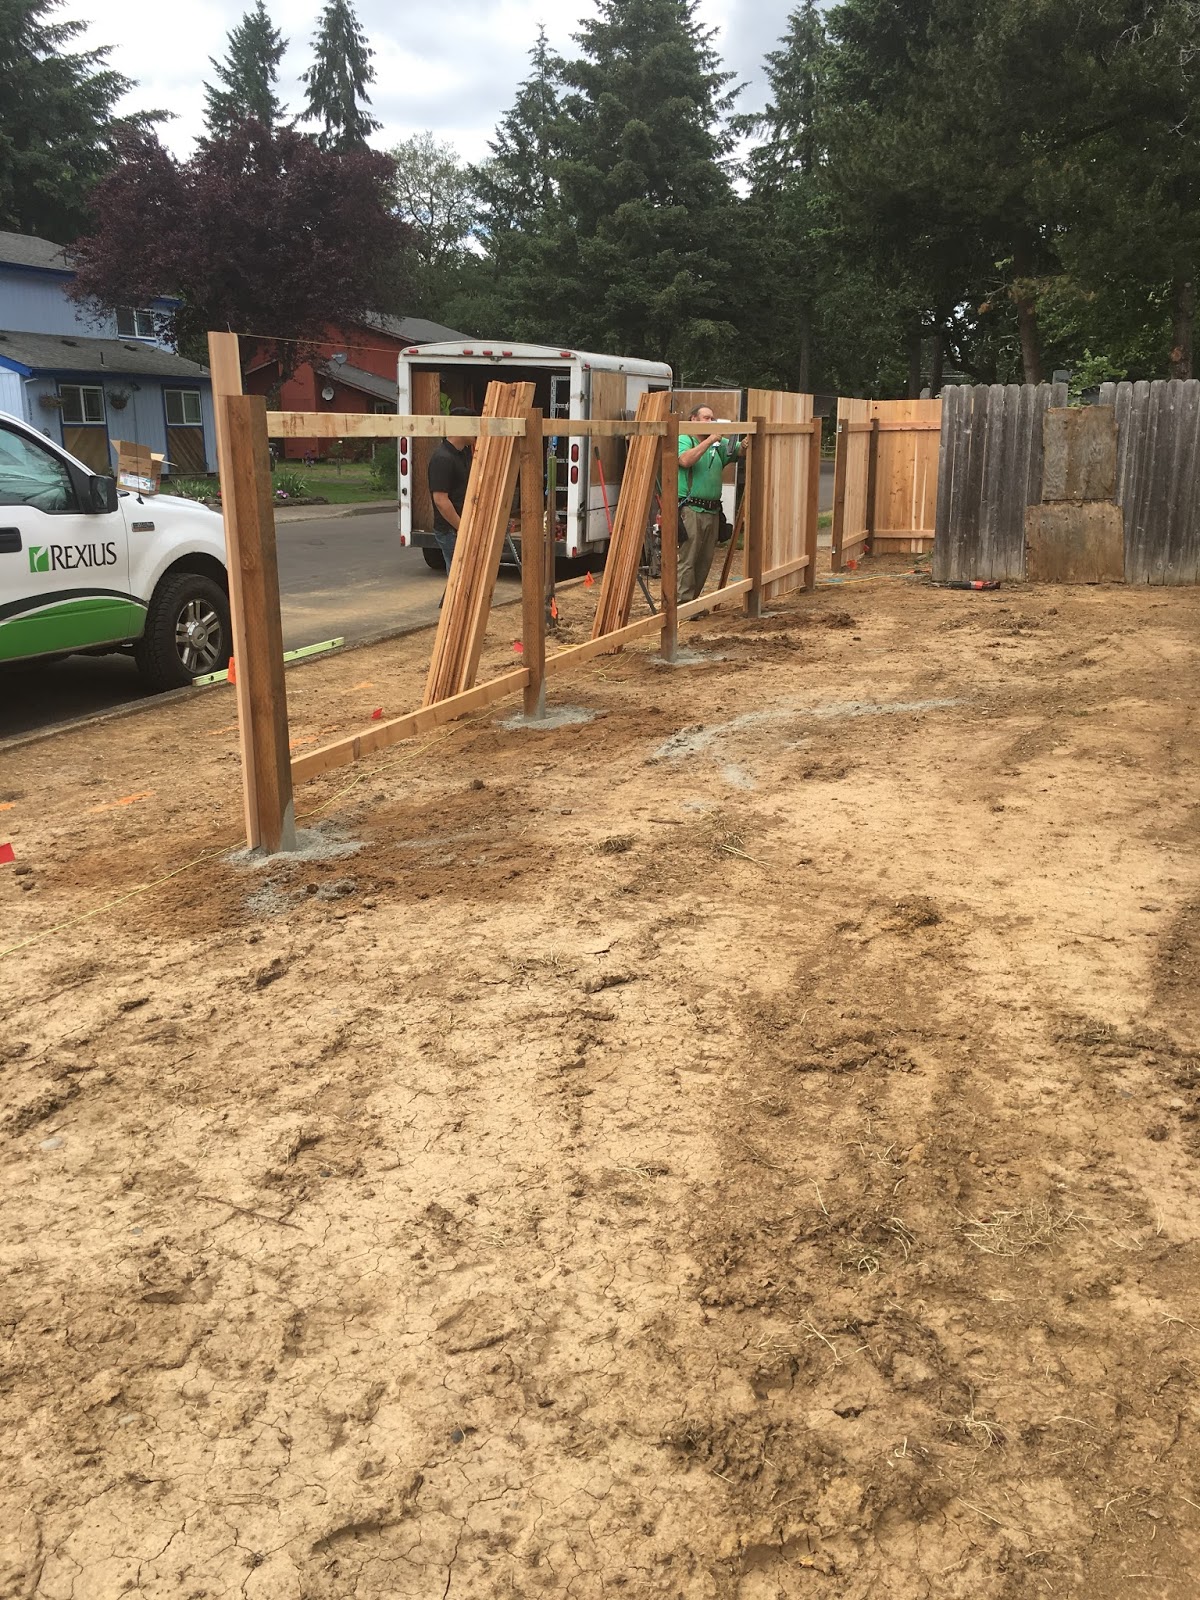
A lovely fence was built, with privacy for the backyard, and a framed wire fence surrounding the front yard. I love my choice of fencing and wouldn't change it in any way!
Work begins on the fence

The fencing is done and we're ready to spread compost!

Now the fun part began: I started planting things. As is the case with many of us, I had a budget to adhere to, and most of said budget had already been spent on the big stuff. But I knew that I'd be able to add and expand over the next several years, so I was content to start small. I most planted annual vegetable seeds and starts, although I was able to plant three blueberry bushes that rewarded me with almost two quarts of blueberries! (When the bushes grow big, I'll be blueberry rich for sure!) And I planted two artichoke plants, which come again except in the very coldest of winters when they will die back. Still I love artichokes, so I took the chance. I also planted some perennial herbs and flowers...but mostly I stuck with cheap annual veggies and flowers.

My garden grew.


And grew!

AND GREW!


Delphiniums are a favorite of mine!


Borage in full bloom. Good for people and good for my bunnies.

My first year of front-yard gardening is winding down. I'm hoping to make some raised beds for next year because I think it will keep the area looking more organized. But I'll continue to have a wide swath of flowers all around the perimeter. Bees love flowers. I love flowers (and herbs!). And my neighbors seem drawn to the colors and textures.

In the early morning I pour my first cup of coffee and wander through the garden. I water, or weed, or harvest, depending on the current need. But I always--always--cherish the time spent among my plants. They feed my body as well as my soul, and I'm grateful.

Blessings to you and yours. Life is guaranteed to be difficult sometimes, but when life gets ugly, hold your head up, square your shoulders, and carry on. Because you are precious!

Georgia

Wednesday, August 17, 2016

How to Make Self-Rising Flour...Cake Flour Too!

Yesterday I got a wild bee in my bonnet and just HAD to bake some biscuits using a new recipe. One of the ingredients happened to be self-rising flour, which I never keep on hand because it's so easy to make my own. But that didn't slow me down because it's so easy to make your own. Here's how:


Homemade Self-Rising Flour

For every one cup of flour, measure out the flour and then remove 1 3/4 teaspoons flour (you'll be adding that amount back in with the following ingredients); add 1 1/2 teaspoons baking powder and 1/4 teaspoon salt; mix everything together well and either store it for future use or add it to your recipe. That's it!

Remember that if you decide to use self-rising flour in a recipe that doesn't call for it, you'll want to delete the baking powder and salt (or at least some of it) because it's already included in your special flour.

Homemade Cake Flour

And since I'm on the subject of flour, I thought I'd tell you how to make cake flour also. I have a very few cake recipes that call for this special flour, and my frugal nature won't allow me to run to the store and buy an incredibly expensive box of the stuff. So instead, I haul out my cornstarch and make my own.

First of all, I use all-purpose white flour for this--I've never tried it with whole wheat flour and I don't think it would work well because the gluten content in whole wheat flour is so high. But even so, I can't bring myself to ever buy bleached all-purpose flour, so I opt for unbleached all-purpose flour. I don't know if there would be a difference if using bleached, but I thought I'd throw that out into the ether.
Measure out one cup all-purpose flour; remove 2 tablespoons flour and add 2 tablespoons cornstarch. Mix well and then before using, sift so it's light and fluffy.

Well, I'm going to say good bye for now. I have work deadlines and need to keep on track. Plus three of my grandkids are coming over this evening and we're going to have a magic marker coloring fest (I bought new markers--the kind that don't mark anything except the special pages--and special marker coloring books). I can't wait!

I hope that life is treating you and your loved ones gently. But if you are in the midst of a storm right now, keep your chin up and remember that better times are coming, just as sure as the seasons change.

Georgia

Tuesday, July 19, 2016

Georgia Varozza (Georgia Plain and Simple) Featured in a Podcast with Pioneering Today


Hello, friends-

I was recently featured in a podcast with Melissa K. Norris of Pioneering Today. Our conversation was wide-ranging and fun, fun, fun! I hope you enjoy listening to it as much as I enjoyed talking with Melissa.

Blessings to you and yours,
Georgia

http://melissaknorris.com/10-life-lessons-from-the-amish-and-mennonites/

The Amish Canning Cookbook Is Officially a Bestseller!

Hello, all! Yesterday my publisher informed me that the ebook version of The Amish Canning Cookbook was listed last Friday in Publisher's Weekly as #7 on the top-20 bestsellers list in the cooking, food and wine category. I'm pretty happy about that!


Thursday, May 12, 2016

Relaxing Tea Recipe

Hi, all-

Below is the link to a blog post I wrote for the Harvest House Publishers' website. The tea is easy to make in bulk, so when you need soothing in a hurry, you'll have the ingredients on hand.

Enjoy, and blessings to you and yours!

https://www.harvesthousepublishers.com/blog/feeling-overwhelmed-find-calm-in-the-midst-of-chaos

Thursday, March 31, 2016

No-Knead Oatmeal Bread

Hello, all, and happy spring!

The sun is shining and the temperature is mild...something no one who lives in the Pacific Northwest takes for granted at this time of year. There's a reason why we are known for having such lush, green plants and trees, and it's a direct result of all the rain we endure in the winter and springtime. (Days and sometimes weeks at a time!) So when we are blessed with a sunny day, we take advantage of it!

When the sun shines, we get outside if at all possible. But we still must feed our loved ones, and today's recipe might work well on such a busy day. You see, it's a recipe for yeast bread, but there's no need to knead. The bread is tasty and makes a good sandwich bread, which you can use for tomorrow's lunch if you have any leftovers. Really, that's rather surprising to me, because a no-knead bread generally is crumbly, while this loaf performs quite well.


The bread may not be pretty, but it's a great addition to your recipe cache. It works up fairly quickly, takes minimal input from you, and produces a tasty loaf that will put a smile on your family's faces. What's not to like about that?


No-Knead Oatmeal Bread

2 to 2½ cups all-purpose flour
¾ cup rolled oats
1 tsp. salt
2¼ tsp. (1 package) active dry yeast
1 cup water
¼ cup molasses
¼ cup butter
1 egg

In a large bowl, combine 1 cup of the flour, rolled oats, salt, and yeast; blend well.

In a small saucepan, heat the water, molasses, and butter to quite warm (120º to 130º). Add the warm liquid and the egg to the flour mixture. Using electric mixer or beaters, blend at low speed until flour mixture is incorporated and then turn the mixer to medium speed and continue mixing for 3 minutes. Stir in an addition 1 to 1½ cups of the flour to form a stiff batter. Cover the bowl with a towel and let the batter rise in a warm place until doubled, about 45-60 minutes.

Stir down the batter and then pour it into a greased loaf pan. Cover and let rise until the batter reaches the top of the pan.

Preheat oven to 375º and bake for 35 to 40 minutes or until done. Remove the bread from the pan immediately and cool on a wire rack.
I hope your day is going well and that there is time in your day to pause and simply glory in God's creation. To my way of thinking, that is always a boost to the spirit.
Blessings and peace to you and yours,
Georgia

Thursday, March 17, 2016

Using Epsom Salt in the Garden Helps Plants Grow Lush and Productive

Hello, all!

I was asked to write a guest blog post over at Amish Reader, and decided that--because the days are lengthening and warming up--I'd write about the uses of Epsom salt in the garden. I learned the secret of using Epsom salt many years ago from an elderly Amish Mennonite woman, and since then I've expanded my use to include the veggie garden and fruit trees.

You can read about these uses at http://www.amishreader.com/2016/03/14/a-gardening-secret-learned-from-the-amish-article-by-georgia-varozza/

Enjoy!

Blessings,
Georgia

Saturday, December 26, 2015

Homemade Cough Syrup!

I've seen recipes for homemade cough syrup all over the internet lately and thought I'd add mine to the lot.

Here it is, in all its boozy glory:


Homemade Cough Syrup

1 half-gallon canning jar, washed and sanitized, or 2 wide-mouthed quart jars
1-2 white onions, peeled and thinly sliced (I used one big onion)
2-4 lemons, unpeeled and thinly sliced (I used organic lemons and washed them well before slicing)
1 pint bottle peppermint schnapps
1 pint bottle blackberry brandy (or any flavor that appeals to you)
1 "honey bear" bottle of honey (or about 2 cups)

Slice the onions and lemons and add them in layers in your very clean jar. Pour in the honey, peppermint schnapps, and brandy. Stir to mix. (This will take a bit of doing because the honey is thick.) Now cover the jar with a tight fitting lid and set it in the refrigerator. You can use it immediately, but of course it will be better after it sits for a time. No need to take out the lemons and onions.

Keep in mind that this can sit in your refrigerator for months and months because the alcohol keeps mold from forming. (Although I'll still check things over carefully before I use it.) Every once in awhile, give the jar a swirl to move the contents around. I have no real idea if that is necessary, but it'll make me feel like I'm taking care of things!

When you need some cough syrup, take about 1 tablespoon for adults or 1/4 to 1/2 teaspoon for children. Remember there is alcohol in it--lots of alcohol to my way of thinking, but then again, I'm not a drinker--so have a care in dosing. But it's also true that there isn't anything in this cough syrup mixture that is actual "medicine," so it seems like a relatively safe alternative to the store-bought kind.

I hope you don't get sick this winter, but if you do, and if you have an aggravating cough to contend with, this just might be your solution.

Blessings to you and yours,
Georgia

P.S--I tasted this but so far haven't needed it to quiet a cough. I kind of hope I never need to find out how efficacious it is because that'll mean I'm sick! But it's in my fridge, just waiting to make me feel better. That's a good feeling!

Cold Remedy Tea--Soothing Relief for Chest Colds, Coughs, and Scratchy Throats

Winter is here, and with the cold, dreary days comes cold and flu season. This tea recipe helps to reduce the unpleasant symptoms of scratchy throats, congested chest colds, and coughs. And believe it or not, it tastes sort of like chi tea with a bit of a zing to it. Even better, you probably have all the ingredients in your kitchen cupboards so there's no need to go to the store when you're not feeling your best.


Cold Remedy Tea

1 green tea bag (you can use black tea if that's all you have)
1/2 tsp. cloves (whole or ground)
1/2 tsp. turmeric
1/2 tsp. thyme
2 tsp. honey or to taste
juice of half a lemon, about 1/8 cup (or use bottled lemon juice--the real stuff with no added ingredients)

If you are using ground spices, put them in a very fine mesh loose tea steeper, or simply measure the spices into the bottom of your mug. (I use ground spices because that's what I have, and I simply dump them into my mug.) Add the tea bag and pour boiling water into your mug, leaving enough room to later add the honey and lemon. Do not add the honey or lemon at this time.

Steep the tea and spices for 3-5 minutes, covered. Strain the tea: I use a coffee filter that I rubber band around the edge of my mug and then slowly pour the tea into the well of the filter. Because of the ground spices, it filters slowly into the mug, so be careful! You can also use several layers of cheesecloth, but coffee filters work better. Next, I add the honey and lemon. I like lots of lemon juice and honey in my tea, so I adjust the amounts to taste.

Now. Even though I filter the tea, it's still not clear, but it doesn't bother me and isn't gritty (at least not much!). If you let the tea sit in your cup, the cloudy residue from the spices will settle toward the bottom. You can drink carefully to keep at least most of the cloudy residue in the bottom, but I actually like to swirl the liquid in my mug before taking a sip. (I'm working under the assumption that by ingesting at least some of the residue I'm getting greater benefit!)

Mug of tea. You can see that's it's not clear.

Next time you're feeling puny, give this soothing tea a try!

Blessings to you and your loved ones. Head out today and bless someone who needs it. In my opinion, that would be everyone!

Stay well,
Georgia

Sunday, December 13, 2015

Will It Snow at Your House? Know Your Elevation!

Here in the Pacific Northwest, we have had a wet and windy winter so far, and the season has just begun. As it happens, snow is falling in my area this morning, and local weather forecasters are saying that we are almost guaranteed to see some snow if we live above about 500 feet in elevation.

Here's my nod to "just in case." (Because the power usually goes off!)


So how do you know if you're destined for the white stuff, or if you will dodge the next snow storm? It's easy enough to find out because there are websites that will tell you just what the elevation is right where you live:

www.veloroutes.org

or

www.whatismyelevation.com

You can actually type in your street address along with the city/state/etc. where you reside and these nifty websites will spit out your elevation in feet or meters, depending on your preference.

Give it a try and see if you should batten down the hatches and prepare for blizzard conditions! And if you like to can food, these websites are handy for finding out if you need to increase your processing time in order to safely can your food. But no matter what, this information is just plain fun to know.

Enjoy!

Wednesday, November 25, 2015

Handspun Mittens

It's cold around here and that means I get to wear my fingerless gloves, regular gloves, and mittens--all hand knit, of course!

But probably my favorite pair are these:

The yarns are handspun (for the knitting as well as the embroidery.) After completing the knitting, I slightly fulled the mittens to smooth out the stitching as well as to add warmth. Next, I added the embroidery. (Embroidered freehand.) Even more fun, the dying was done using cake frosting decorating gels. The colors are saturated, which is what I was going for. Nothing like a bright and cheery pair of mittens to see me through the long winter!

Thanksgiving is tomorrow. May you have a peaceful day. :)

Blessings,
Georgia

Monday, November 23, 2015

Link to Amish Reader Guest Blog Post--Leftover Ham Pie

Brrrr! This morning was another frigid one. Winter has definitely come, and when the days are short and cold, hearty fare just tastes good.

I was asked to do a guest blog post for AmishReader.com and want to share the link with you. It's a recipe for ham pie that has potatoes, onions, and apples in it. The ingredients work well together, and if you are using leftover ham that might otherwise go to waste, it's a frugal dish as well. (Which, of course, always makes me happy!)

Here is the link: http://www.amishreader.com/2015/11/23/thanksgiving-leftovers-recipe-ham-potato-apple-pie/

I suggest you give it a try!

Stay warm. And stay well fed!

Blessings,
Georgia

Monday, November 16, 2015

Creamy Lime Jello Salad

The recipe I'm going to share with you today is a good one. We have made this molded Jell-O salad since I was a kid...which is approximately when the earth was still flat. :)

It's a great Jell-O salad to make for holiday feasts such as Thanksgiving. But really, anytime of the year is a good time to make it.

Our Molded Jell-O Salad

(Yes, I know that's a weird name, but that's what we always called it...as in, "Are we going to have our molded Jell-O salad for Thanksgiving this year?")

1 small package lime Jell-O
1 small package cream cheese
1 cup hot water
3/4 cup pineapple juice from canned pineapple (see next ingredient)
1 small can pineapple tidbits, drained but save the juice
1/4-1/3 cup chopped walnuts
1 T. vinegar
2 T. sugar
1/4-1/3 cup chopped walnuts
1/4 pint cream, whipped

Dissolve Jell-O in 1 cup hot water; add 3/4 cup pineapple juice. (If you need to, you can add some cold water to make a total of 3/4 cup.) Add cream cheese and beat on low with electric mixer until frothy and cream cheese is broken up completely. Add the vinegar, sugar, and walnuts and stir to mix well. Set in the refrigerator until it begins to set. Fold in the whipped cream and chill until completely set, for several hours.

You can serve it plain or add some sweetened whipped cream on top.

Yum!


Tuesday, November 10, 2015

Slow Cooker Lemon Chicken with Carrots


I'm not a fan of slow cookers (aka Crock Pots). Never have been. So why am I sharing a slow cooker recipe? Well, it's because of my neighbors.

But first a little digression. I moved into "town" about 5 years ago. By "town," I mean a small berg of about 2500 folks. But having raised my sons in the country, this was a mighty big adjustment for me. I was a bit nervous about having neighbors all around, and I wondered if they would be nice. I didn't hold out too much hope because after all, I was about to move into the big, bad "city." But I was absolutely, 100 percent wrong I'm glad to say. Since I have been here I have been repeatedly touched and amazed by the kindnesses shown me.

One neighbor--a 40-some-odd-year-old man, who looks like a very well muscled and kind of scary bear--has turned out to be a gem. He has stepped in to help me so many times that I now fondly call him my angel in disguise. (And whenever I do, he always gets embarrassed, but it's true!) Just this week he popped over to take measurements for a new door that I need as my old one is broken and needs to be replaced. (Now that's a story in itself! My home was recently burglarized while I was on a trip to California but the young man who burgled me realized--when he turned on my computer that he had stolen and saw my name on the opening screen--that he knew who I was from when he was a kid. He actually came back and returned all of the things he stole from me. He told my sons--who had shown up because another kind neighbor had driven to one of my son's homes to say that something was wrong at my house--that he felt bad because he remembered me from years ago and I had always been kind to him. My sons invited him in while they waited for the sheriff to show up, and the repentant burglar came in willingly. Amazing!)

Another neighbor is helping me to remodel my bathroom. He's retired and says he loves to remodel bathrooms. Ha! I find that hard to believe, but he solemnly swears this is so. And yet another neighbor showed up at my door this morning and informed me that he was here to cut the two trees I recently got cut down into firewood-sized pieces, and he promptly did just that.

As you can imagine, I've been making lots of cookies as thank you gifts lately.

Okay. So back to my chicken recipe. Yet another neighbor is a young husband and father. The family is on a tight budget and the dad recently knocked on my door and asked if I could teach him how to make homemade from scratch macaroni and cheese. While I was at their house cooking and teaching, he mentioned that he'd love some slow cooker recipes if I had any good ones. Well, I don't. But I started thinking that I could come up with a few for them. To wit:

Slow Cooker Lemon Chicken

* You can halve this recipe no problem, which would make it a good choice for smaller families.

2 cans cream of chicken soup (or you can use cream of mushroom soup)
1/2 cup water
1/4 cup lemon juice
2 tsp. Dijon-style mustard
1 1/2 tsp. garlic powder
8 large carrots, peeled and thickly sliced
6-8 boneless, skinless chicken breast halves
hot cooked noodles or hot cooked rice
Parmesan cheese, grated

Mix together the soup, water, lemon juice, Dijon mustard, and garlic powder until well blended. Now add the carrots and chicken and mix again. Place everything but the noodles or rice and Parmesan cheese into the slow cooker. Cook on high for about 7 hours, or on low for about 8-9 hours.

To serve, ladle chicken, carrots, and sauce over noodles or rice. Add Parmesan cheese if desired and dig it. Yum!

I'll no doubt be posting several more slow cooker recipes in the near future, but in the meantime, happy eating!

Blessings to you and yours,
Georgia

Friday, October 30, 2015

Super Easy Dinner!

Recently, I was extremely busy but needed to make dinner. What I came up with satisfied us. It was cheap, easy, and tasty, which are pluses in my book any day!


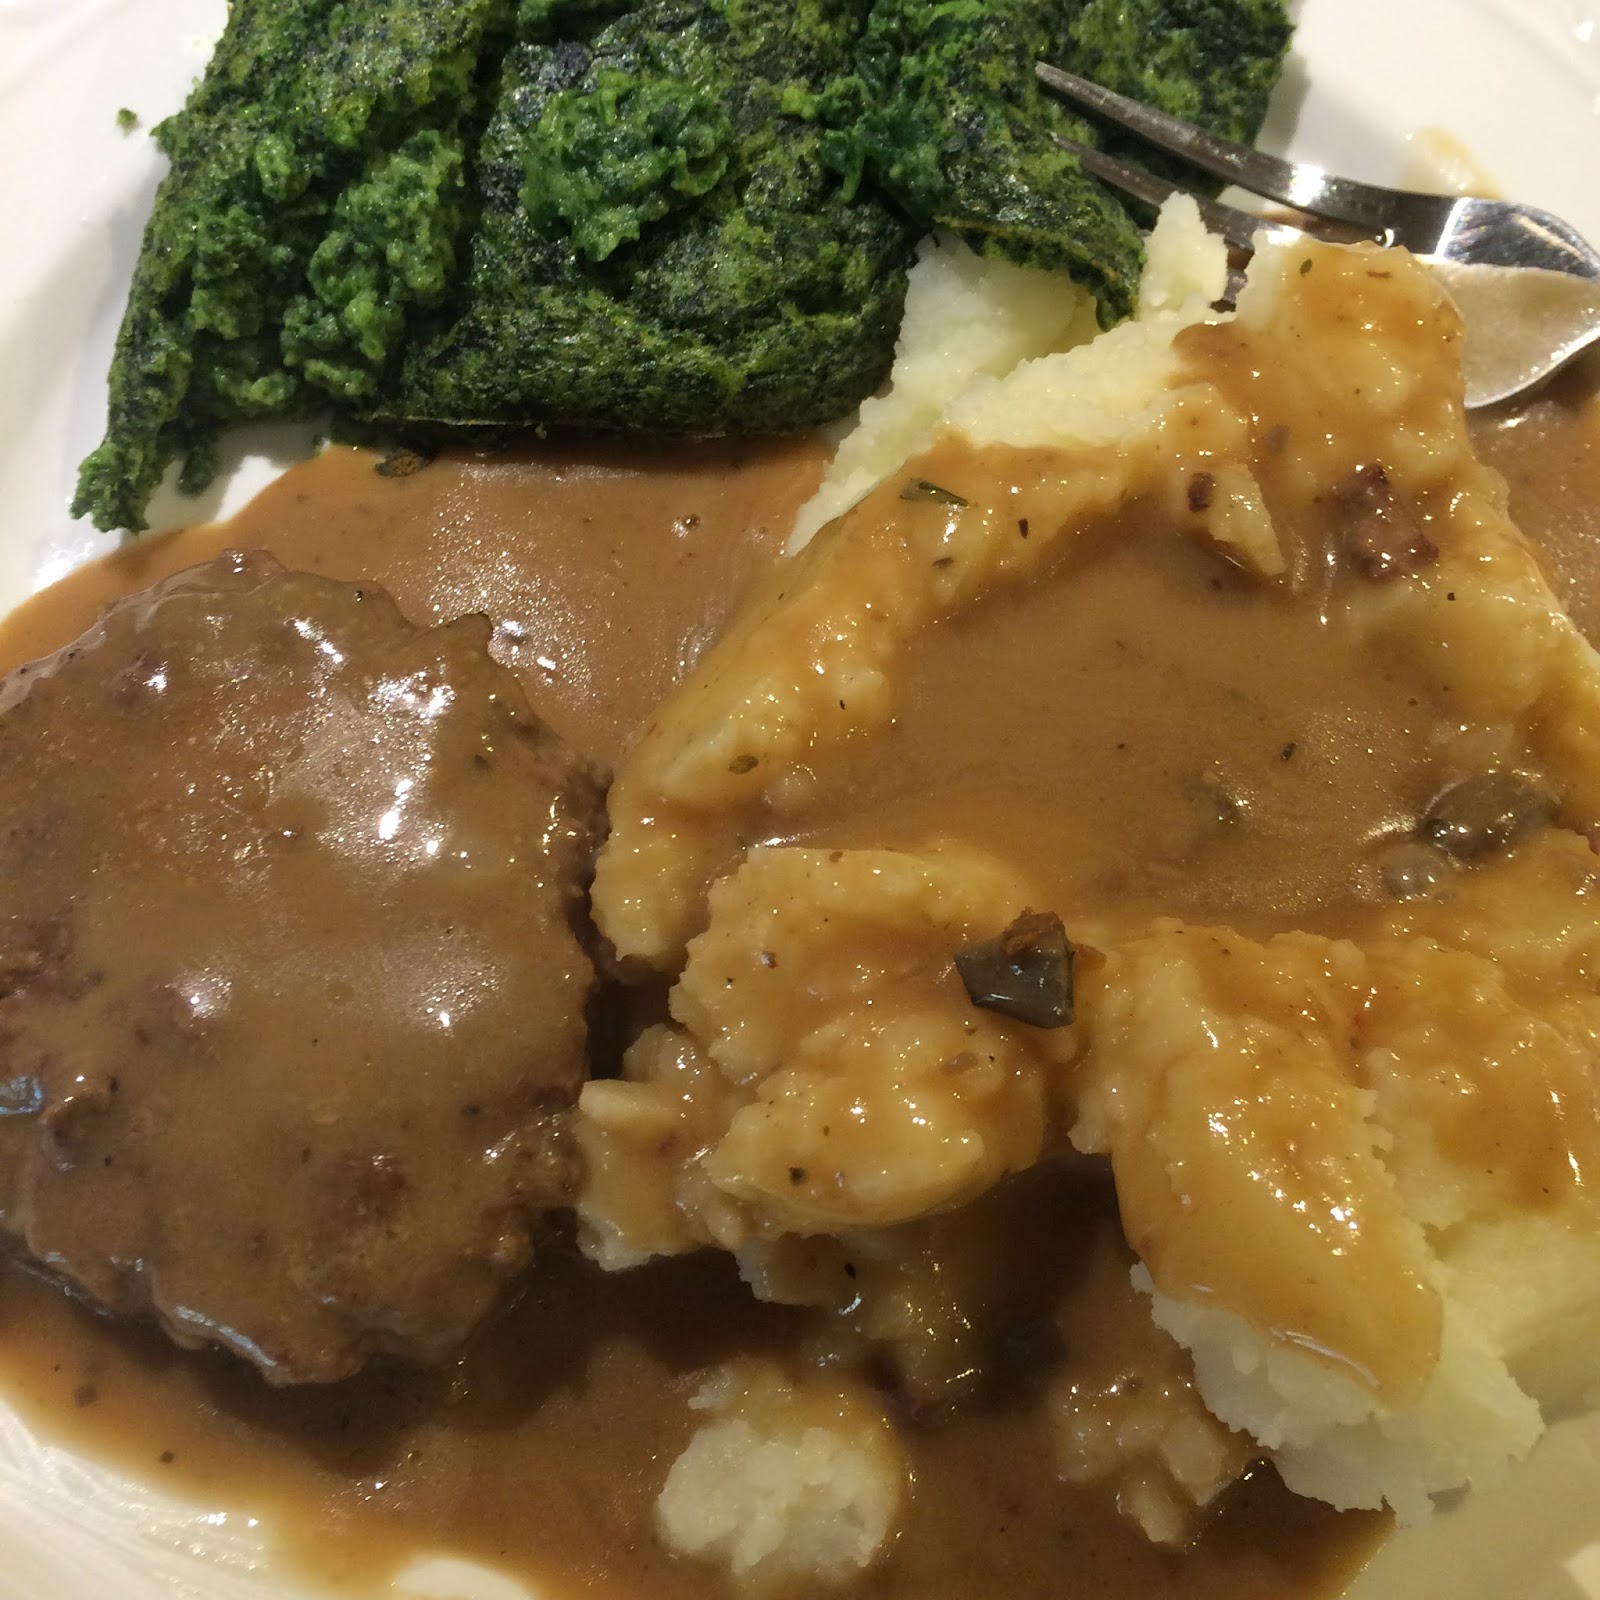
Hamburger Patties and Gravy

1 lb. hamburger (more or less)
1 can cream of mushroom soup
1 1/2 - 2 cans water
1 package dry beef gravy mix
salt, pepper, and seasonings to taste (optional)
Cooked mashed potatoes or noodles

Make patties using the hamburger meat to which you've added salt, pepper, and any seasonings you desire. You can also include a bit of finely diced onion.

Brown the hamburger patties in an oven-proof pot. I use my cast iron and that works super well.

While hamburger patties are browning, mix together the cream of mushroom soup, water, and beef gravy mix. When the hamburger patties have been browned on both sides, pour the soup mixture over the top. Cover the pot with a lid and place in a preheated 350 degree oven; bake until the meat is done and the gravy is bubbling hot. I let mine bake for about 45 minutes with no ill effect--no burning--but it could be because I was using cast iron.

Dish up the hamburger and ladle the gravy over the mashed potatoes or noodles. Serve.

In the photo above, you'll notice the spinach soufflé. It's actually Stouffer's Spinach Soufflé Side Dish. You can find it in the frozen food section of your grocery store. It's good! In fact, I sometimes thaw it out (something you don't need to do if you're baking it in the container it comes in--just follow directions) and stuff large button mushrooms with it. I add a sprinkle of Parmesan cheese and bake them until the soufflé is done, about 45 minutes.

Well, there you have it. I think of this as a semi-cheater's meal because of the canned soup and dry gravy mix. I don't usually go that route, but like I said, I was in a tearing big hurry. And it's still an inexpensive meal, even with the packaged goods, so I thought it was worth sharing.

Hope all is well with you and your loved ones. The hot summer weather and drought conditions have finally broken around here. We have had several rain fronts move through, and today is no different. We are scheduled to have rain for the next week, and I'm glad for it. I just hope our reservoirs fill back up to capacity. (Without, of course, raining so much that flooding becomes a concern.)

Enjoy the weather!
Georgia

Wednesday, October 14, 2015

German Runzas Recipe

I had lots of cabbage. Lots and lots of cabbage. There's just so much sauerkraut you can make before you rebel. So I decided to make German Runzas, which are cabbage and meat stuffed buns. They're easy and delicious. And keep in mind that you can actually add anything you want (even no cabbage if that's your druthers!) and make stuffed buns that will tickle your taste buds.
Runzas with a dollop of sour cream

German Runzas

4 cups shredded green cabbage
1/2 - 1 lb. hamburger
1 small onion, diced
1/2 cup green or red bell pepper (or a combination)
4 cloves garlic, minced
salt and pepper to taste
1/4 - 1/2 tsp. caraway seeds (optional)
bread dough, enough for 2-3 loaves (see note below for an easy workaround)

Brown the hamburger; only drain off fat if there's a lot. Some fat is good because it soaks into the buns while baking. Add the cabbage, onion, bell pepper, and garlic and saute until the onion is translucent and the hamburger is cooked, about 5 minutes more. Add salt, pepper, and caraway seeds (if using) to taste. Add a spritz of water or broth so the filling isn't bone dry. (Although this isn't absolutely necessary, I like to do that.)
Runza filling


Now turn your attention to the bread dough.

NOTE: You can actually buy bread dough or even pizza dough at the grocery store if you don't have the time to make your own. But you do need to use a yeast-raised bread dough of some kind. (Not biscuit dough.)

Pull off small hunks of dough and pat or roll them out. You want the dough to be on the thin side, but not so thin that it tears when you add the meat mixture. Mine end up being about 5 inches on each side. Place a spoonful of the meat mixture in the middle of the dough square and wrap the dough around the meat mixture. Seal the edges so it's a little round packet. Place seam-side-down on a greased cookie sheet--although I use my silicon baking mats and I think they make better runzas because the bottoms don't get too brown. But suit yourself.

Preheat the oven to 425 degrees. Place the runzas in the oven and immediately turn down the heat to 375 degrees and bake for about 25-30 minutes. (The time will vary depending on how big and how thick your runza buns are, so check them after about 20 minutes.)

Plate them up and serve them with sour cream. Yum!

Talk about simple. And tasty. And filling. And cheap. Some of my favorite attributes for meal-getting.

Be creative. Really, you could make just about any kind of stuffed bun, so use what you have on hand and enjoy the adventure.

Blessings to you and yours. I hope you are enjoying the cooler days of autumn. The leaves are changing color and it's a beautiful sight to behold. I love this time of year!

Georgia


Sunday, September 6, 2015

Cheesy Sausage Biscuits--Another Great School Day Breakfast!

I saw this recipe on the Internet and I wish I could give kudos where they are due. I think I saw it on a site called--believe it or not--Mob Boss. Go figure!

Anyway, I've been thinking about all the kiddos returning to school and since I believe strongly that a good breakfast is the foundation to a good day at school, I wanted to share this recipe for y'all. It took me about 5 minutes to put together and get in the oven. Can't get much quicker than that.

Cheesy Sausage Biscuits

3/4 - 1 lb. sausage (I used some Jimmy Dean's original and it was tasty, but cook's choice)
4 eggs
1 cup shredded cheddar cheese
1 cup Bisquick
couple shakes of salt (optional)

First, turn on the oven to 350 degrees so it has a chance to preheat while you're making the batter.

Grease a 12-cup muffin tin and set aside. (I was in a slothful mood, so I used a spray can of olive oil instead of hand greasing with Crisco or butter, which I'm sure would be good also.)

Next, cook the sausage. I just made sure that the pink was gone but didn't feel I needed to cook it too brown since it would continue baking in the oven. Worked like a charm.

In a medium mixing bowl, beat the eggs well. Add the cheddar cheese and mix well again. Next, add the Bisquick and the shakes of salt and mix well. (I used a large spoon for this.) Now, add the cooked sausage and mix well for the last time. When I added the sausage from the frying pan that I had cooked it in, I simply dumped everything into the mixing bowl--grease and all. The sausage I used seems to be quite lean and there was almost no grease. But if you're squeamish about that, you can always drain off the fat before adding it to the batter.

Bake for 20 minutes and voila! Breakfast is ready.

I was reading in Psalms today and Psalm 5:3 really heartened me. I hope it will encourage you as well: "In the morning I will order my prayer to Thee and eagerly watch."

Our part in this is to establish morning prayers. But God says we can eagerly watch, and I like to think that what we are watching for is how He unfolds our days. I realize that life isn't always easy. In fact, in the last two weeks I've experienced two very traumatic, life-changing events. I'll admit that I got a bit off-kilter there for a few days, but I continued to pray, even though most of my prayers were nothing more than "Help me! Help me!" And I can honestly say that--while I still struggle against anxiety sometimes--I am learning to eagerly watch and wait for His gracious presence in my every day. That's my hope for you too.

So carry on! Show your love and light.

Georgia